- 原文地址 https://blog.poetries.top/2022/07/27/sentry-summary/
- 前端面试之旅:https://interview2.poetries.top
- 公众号:「前端进阶之旅」 每天分享技术干货
Sentry介绍
Sentry是一套开源的实时的异常收集、追踪、监控系统。这套解决方案由对应各种语言的 SDK 和一套庞大的数据后台服务组成,通过 Sentry SDK 的配置,还可以上报错误关联的版本信息、发布环境。同时 Sentry SDK 会自动捕捉异常发生前的相关操作,便于后续异常追踪。异常数据上报到数据服务之后,会通过过滤、关键信息提取、归纳展示在数据后台的 Web 界面中
- Github: https://github.com/getsentry/sentry
- 文档 https://docs.sentry.io/
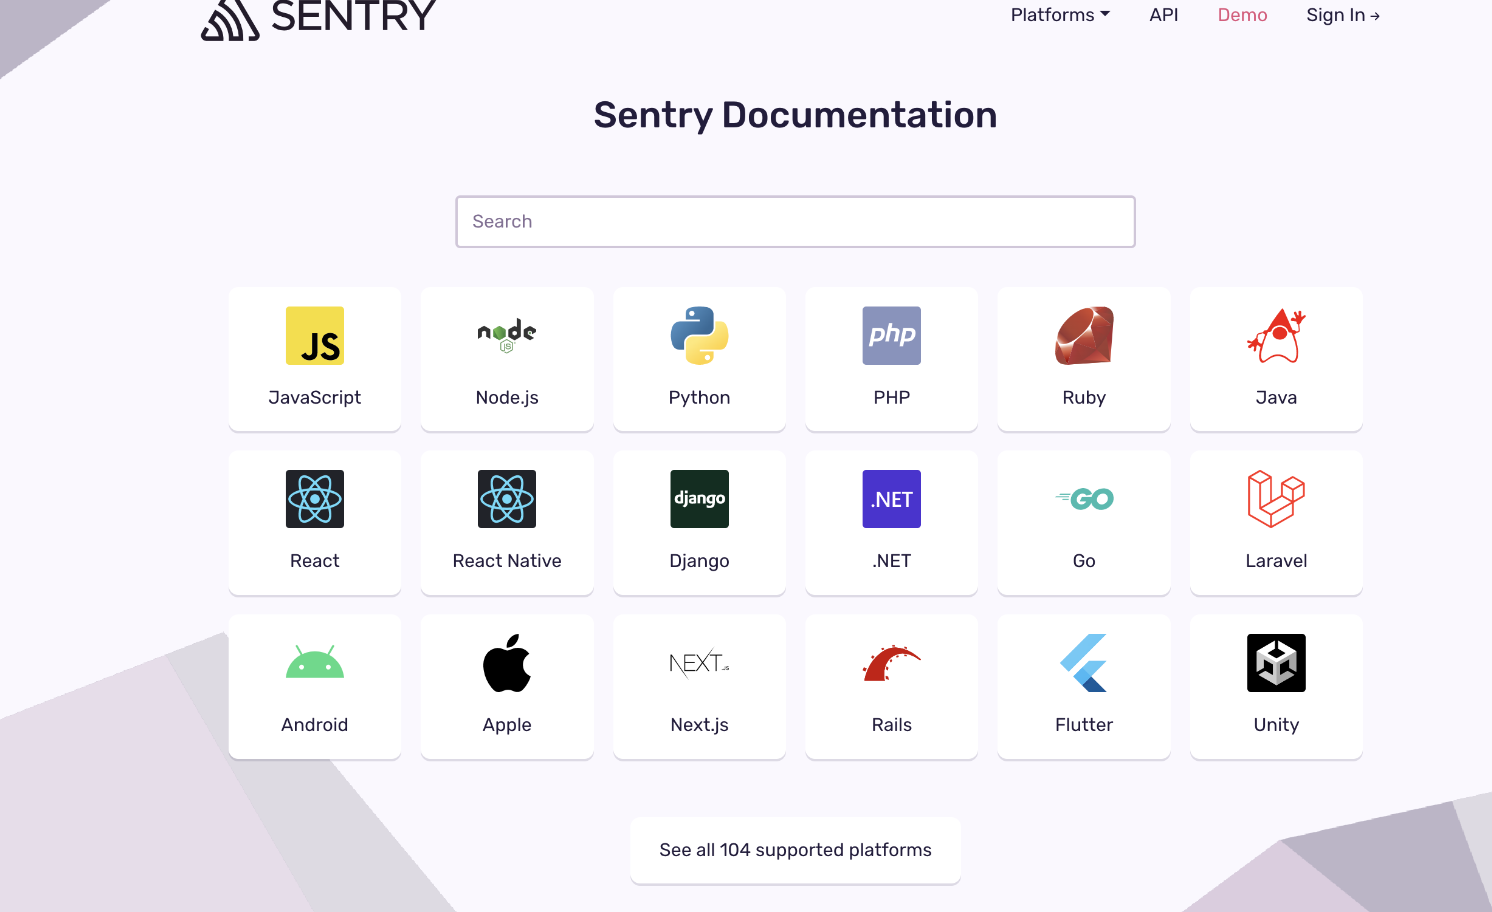
支持如下语言
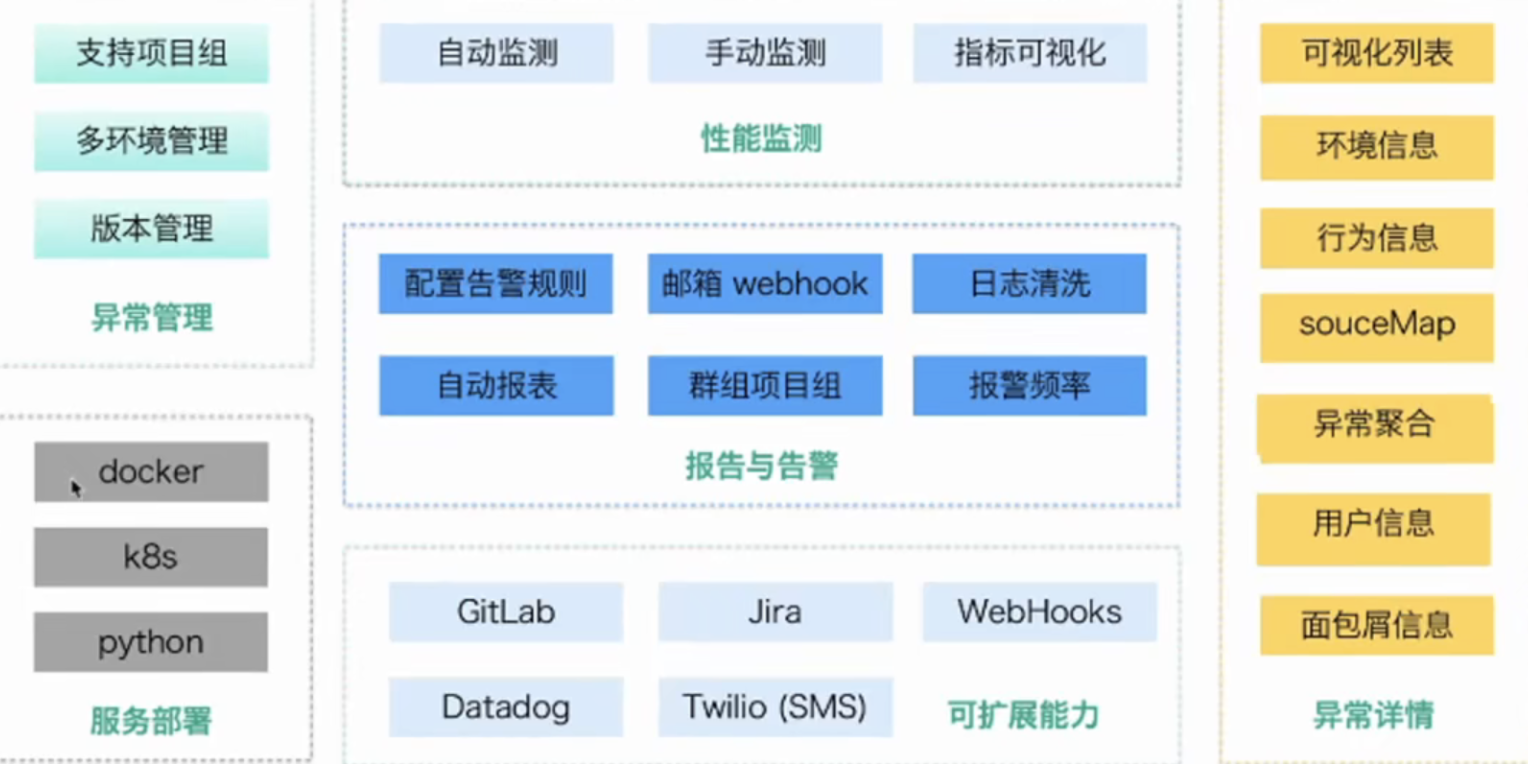
sentry功能架构
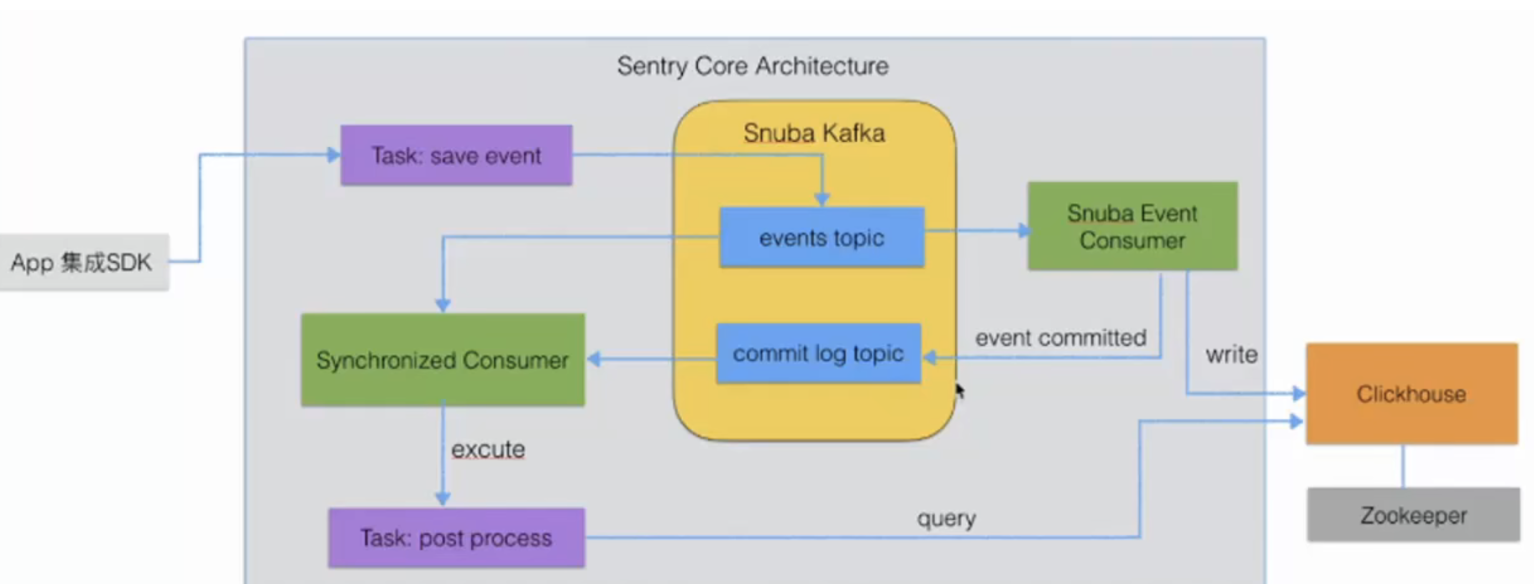
sentry核心架构
环境搭建配置
官方Sentry服务
sentry是开源的,如果我们愿意付费的话,sentry给我们提供了方便。省去了自己搭建和维护 Python 服务的麻烦事
登录官网 https://sentry.io 注册账号后接入sdk即可使用

Sentry私有化部署
Sentry 的管理后台是基于
Python Django开发的。这个管理后台由背后的 Postgres 数据库(管理后台默认的数据库)、ClickHouse(存数据特征的数据库)、relay、kafka、redis 等一些基础服务或由 Sentry 官方维护的总共 23 个服务支撑运行。可见的是,如果独立的部署和维护这 23 个服务将是异常复杂和困难的。幸运的是,官方提供了基于 docker 镜像的一键部署实现 getsentry/onpremise
sentry 本身是基于 Django 开发的,而且也依赖到其他的如 Postgresql、 Redis 等组件,所以一般有两种途径进行安装:通过 Docker 或用 Python 搭建
前置环境
需要安装对应版本,否则安装会报错
Docker 19.03.6+Docker-Compose 1.28.0+4 CPU Cores8 GB RAM20 GB Free Disk Space
安装docker环境
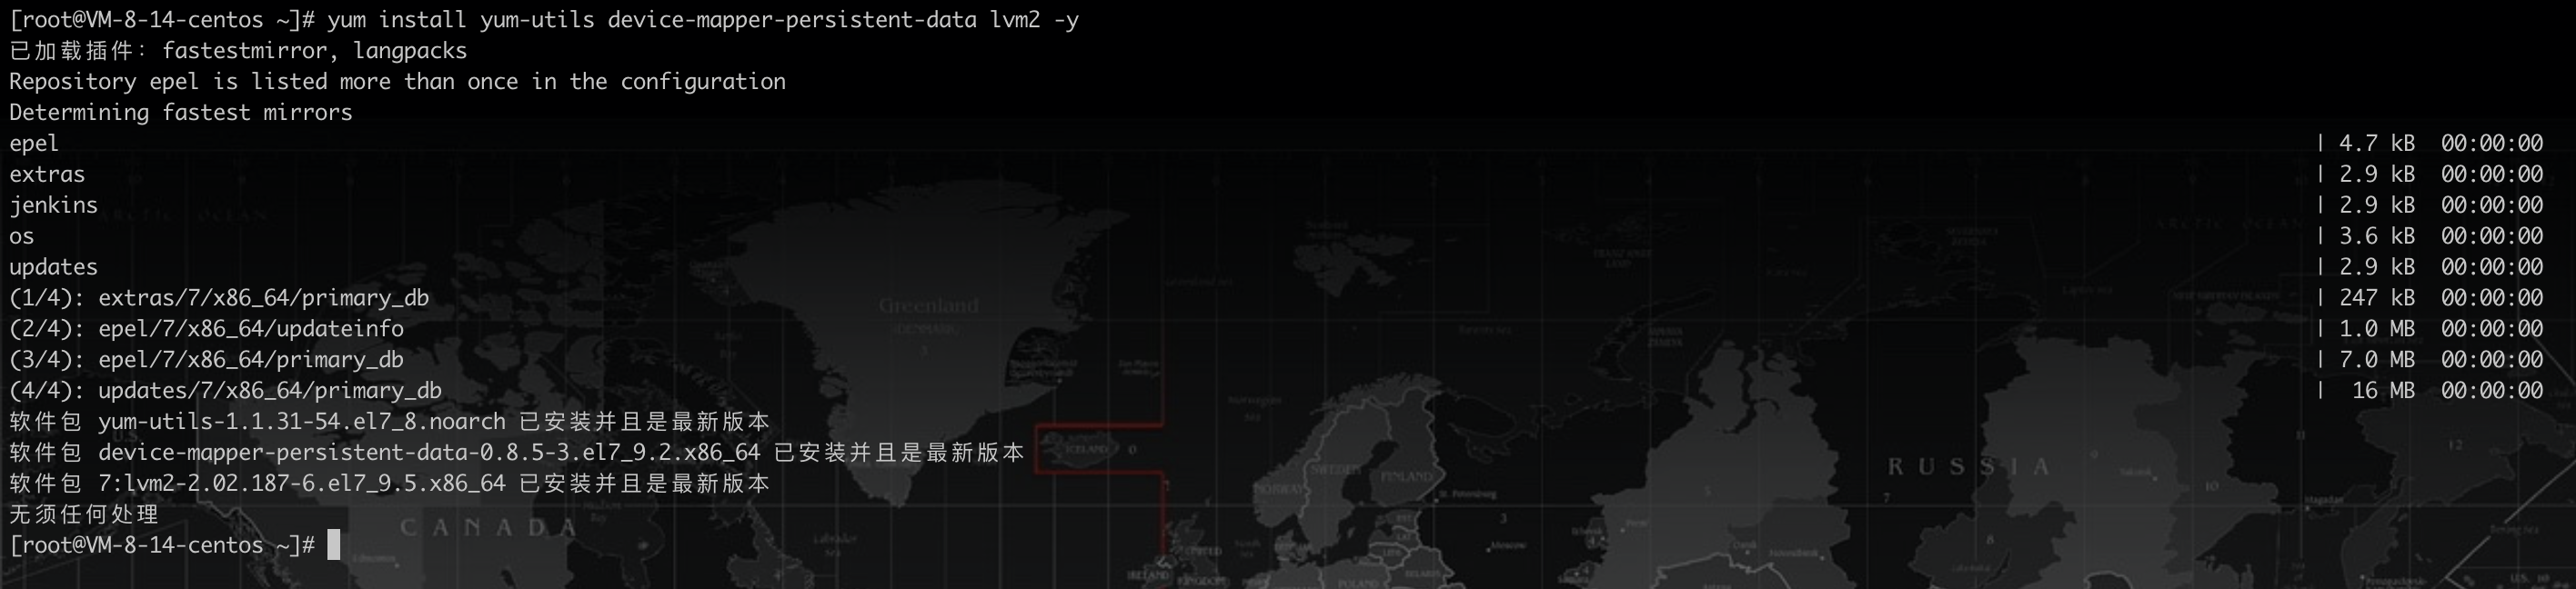
安装工具包
yum install yum-utils device-mapper-persistent-data lvm2 -y
设置阿里镜像源
yum-config-manager --add-repo https://mirrors.aliyun.com/docker-ce/linux/centos/docker-ce.repo

安装docker
yum install docker-ce docker-ce-cli containerd.io -y
启动docker
systemctl start docker

# 设为开机启动
systemctl enable docker
docker 镜像加速(重要)
在后续部署的过程中,需要拉取大量镜像,官方源拉取较慢,可以修改 docker 镜像源
登录阿里云官网,打开 阿里云容器镜像服务。点击左侧菜单最下面的 镜像加速器 ,选择 Centos
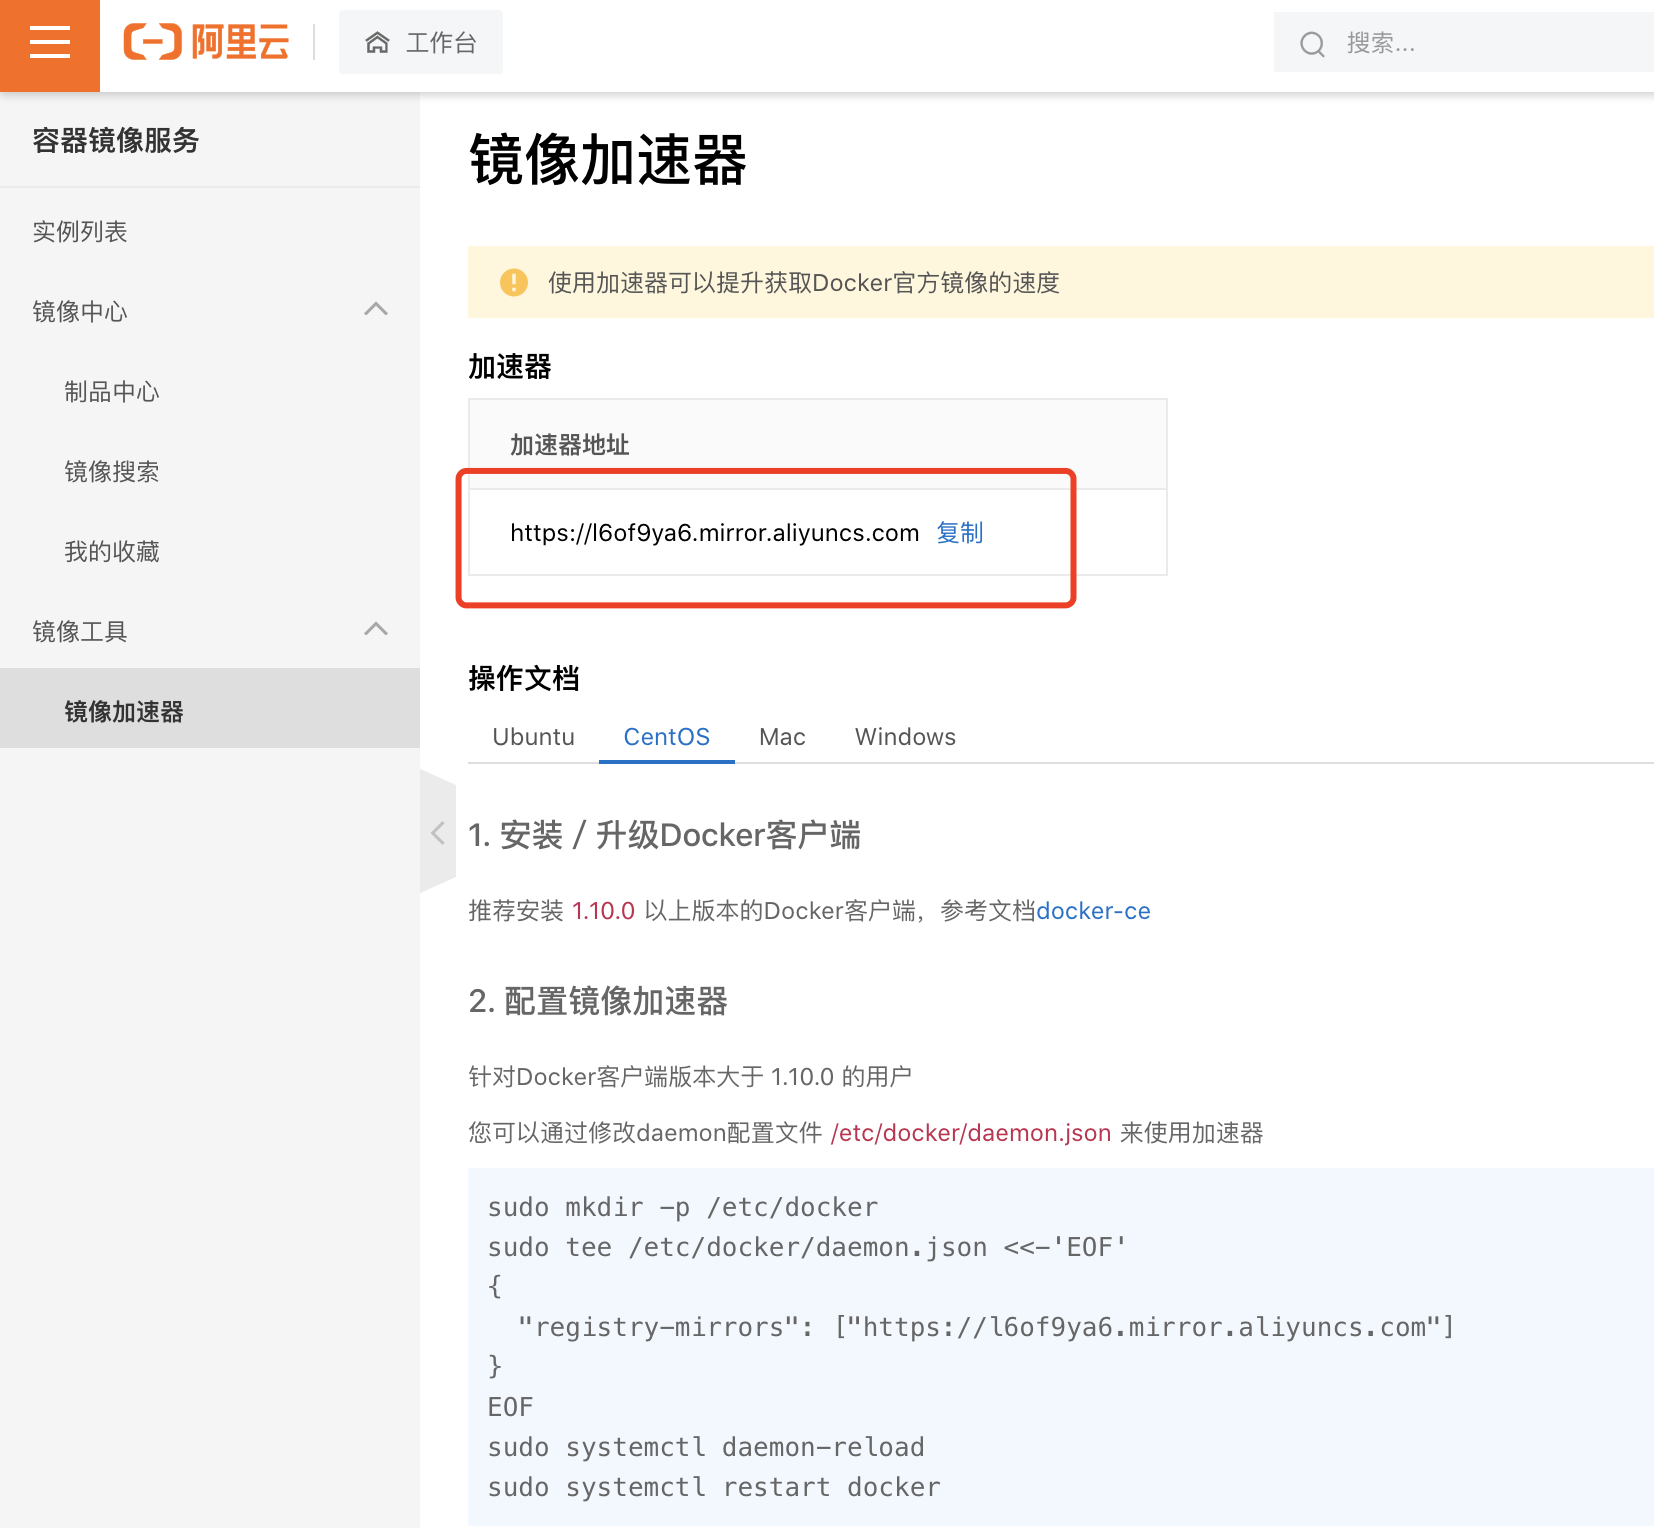
vi /etc/docker/daemon.json
{
  "registry-mirrors": ["https://l6of9ya6.mirror.aliyuncs.com"]
}
然后重启docker即可
# 重新加载配置
systemctl daemon-reload

# 重启docker
systemctl restart docker
安装docker-compose
# 使用国内源安装
sudo curl -L "https://get.daocloud.io/docker/compose/releases/download/1.29.2/docker-compose-$(uname -s)-$(uname -m)" -o /usr/local/bin/docker-compose
设置docker-compose执行权限
chmod +x /usr/local/bin/docker-compose
创建软链
sudo ln -s /usr/local/bin/docker-compose /usr/bin/docker-compose
测试是否安装成功:
$ docker-compose --version

docker-compose version 1.22.0, build f46880fe
一键部署
git clone https://github.com/getsentry/onpremise
在
onpremise的根路径下有一个install.sh文件,只需要执行此脚本即可完成快速部署,脚本运行的过程中,大致会经历以下步骤:
- 环境检查
- 生成服务配置
-
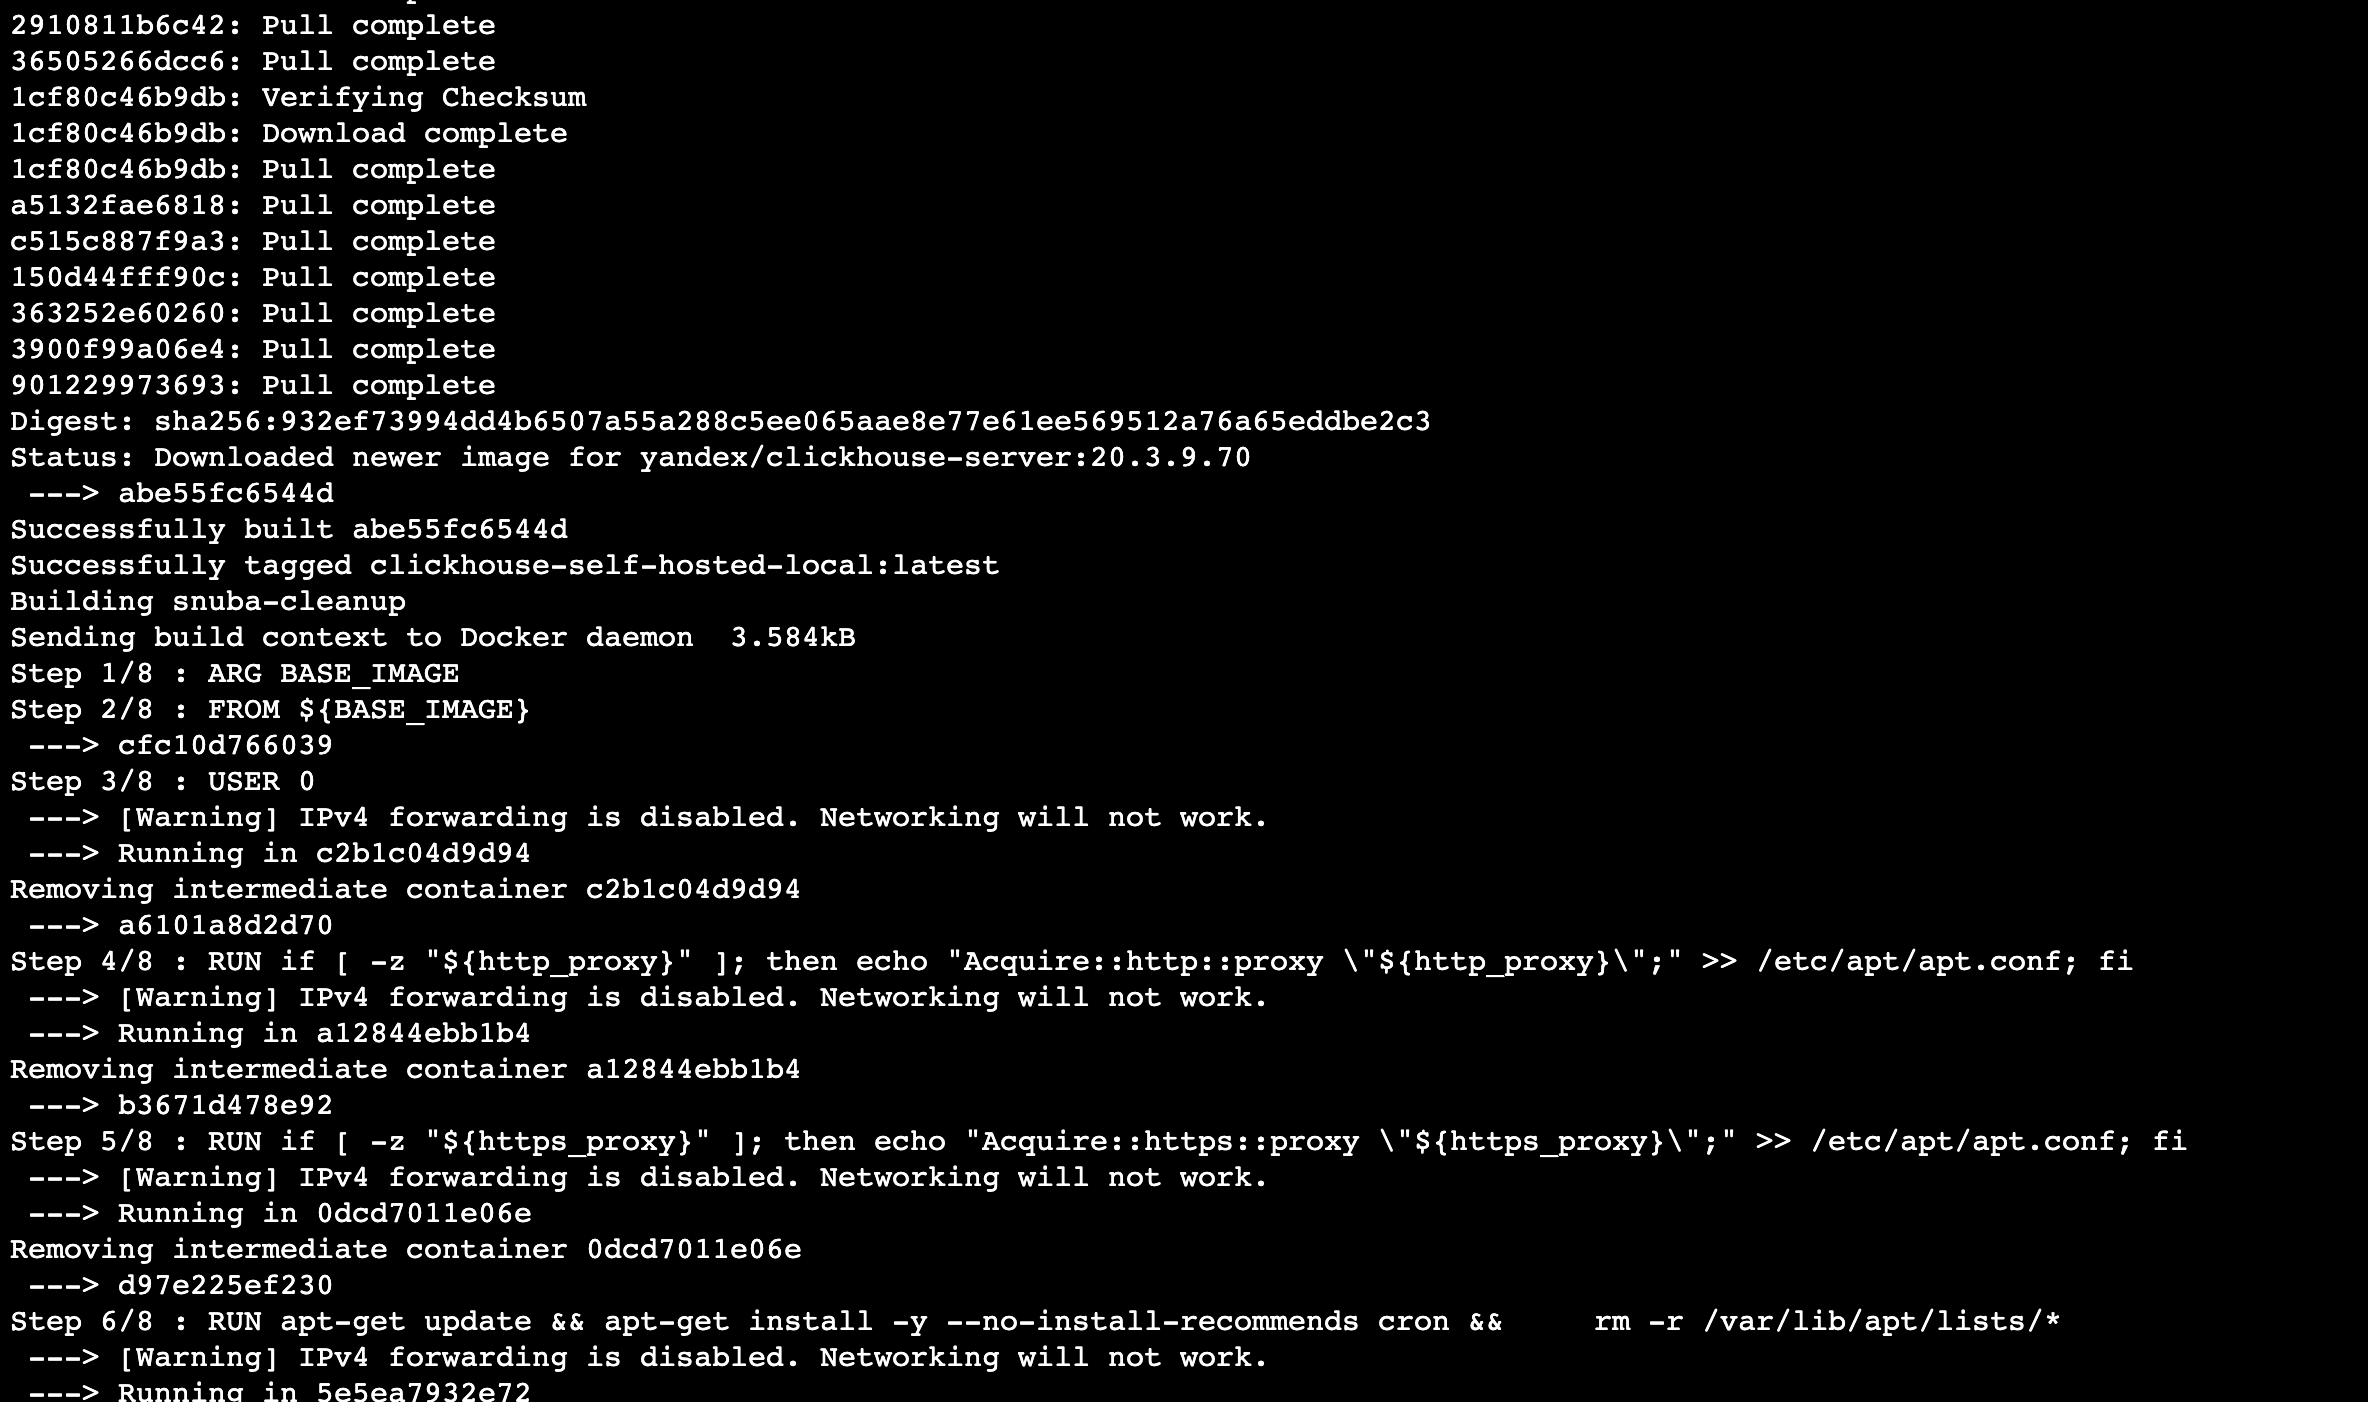
docker volume数据卷创建(可理解为docker运行的应用的数据存储路径的创建) - 拉取和升级基础镜像
- 构建镜像
- 服务初始化
- 设置管理员账号(如果跳过此步,可手动创建)
cd onpremise

# 直接运行 ./install.sh 将 Sentry 及其依赖都通过 docker 安装
./install.sh
后续一步一步安装下来

设置管理员账号(如果跳过此步,可手动创建)
启动项目执行
在执行结束后,会提示创建完毕,运行 docker-compose up -d 启动服务
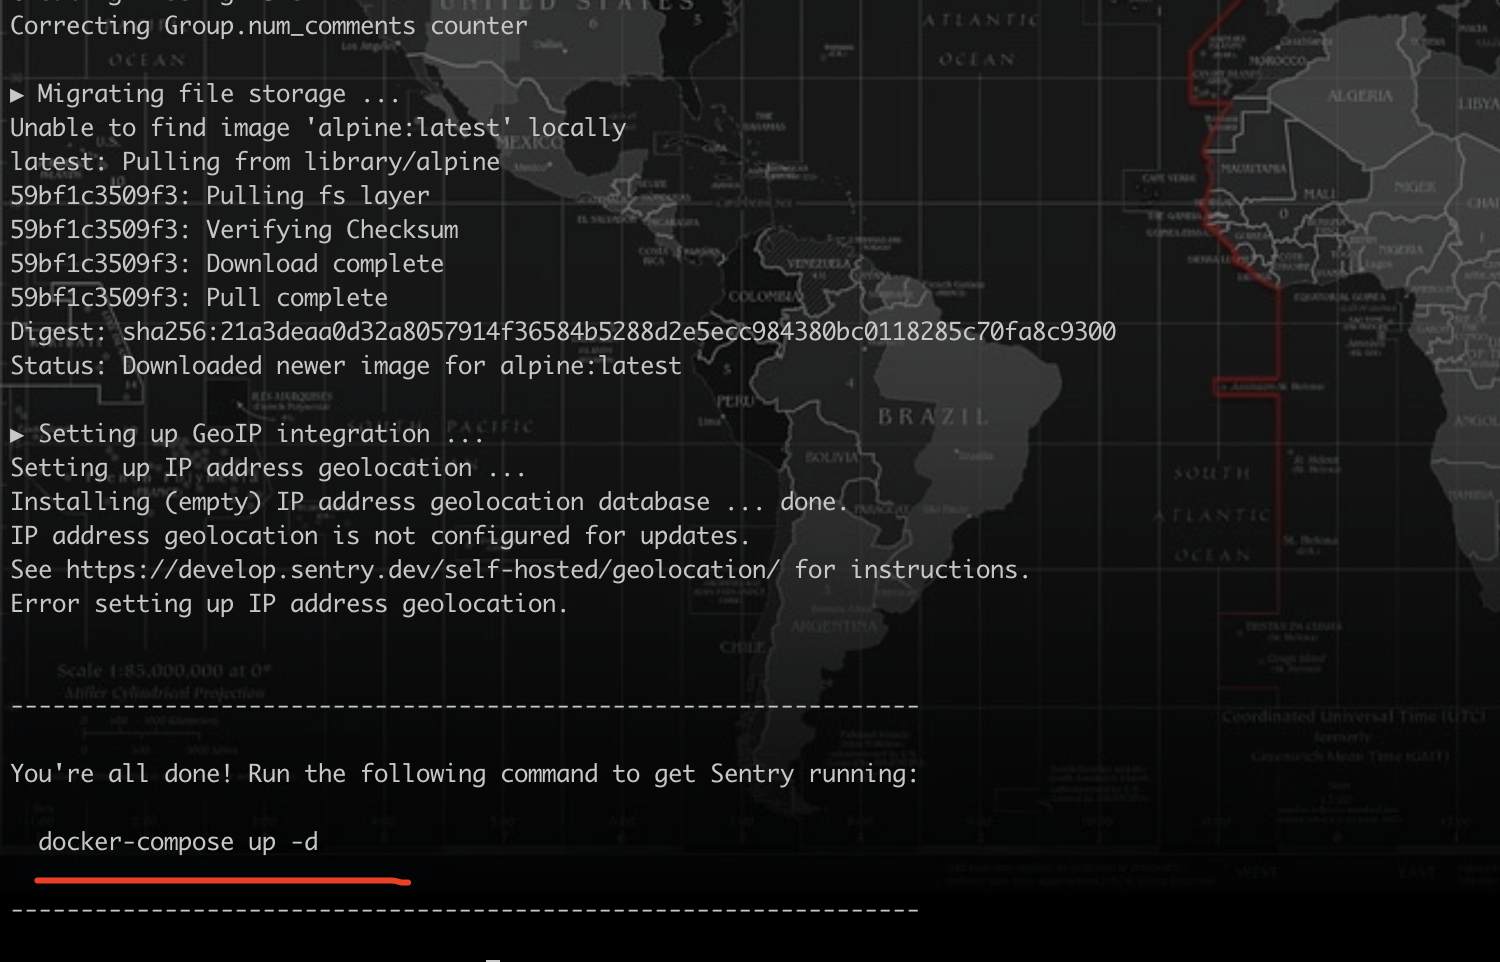
docker-compose up -d

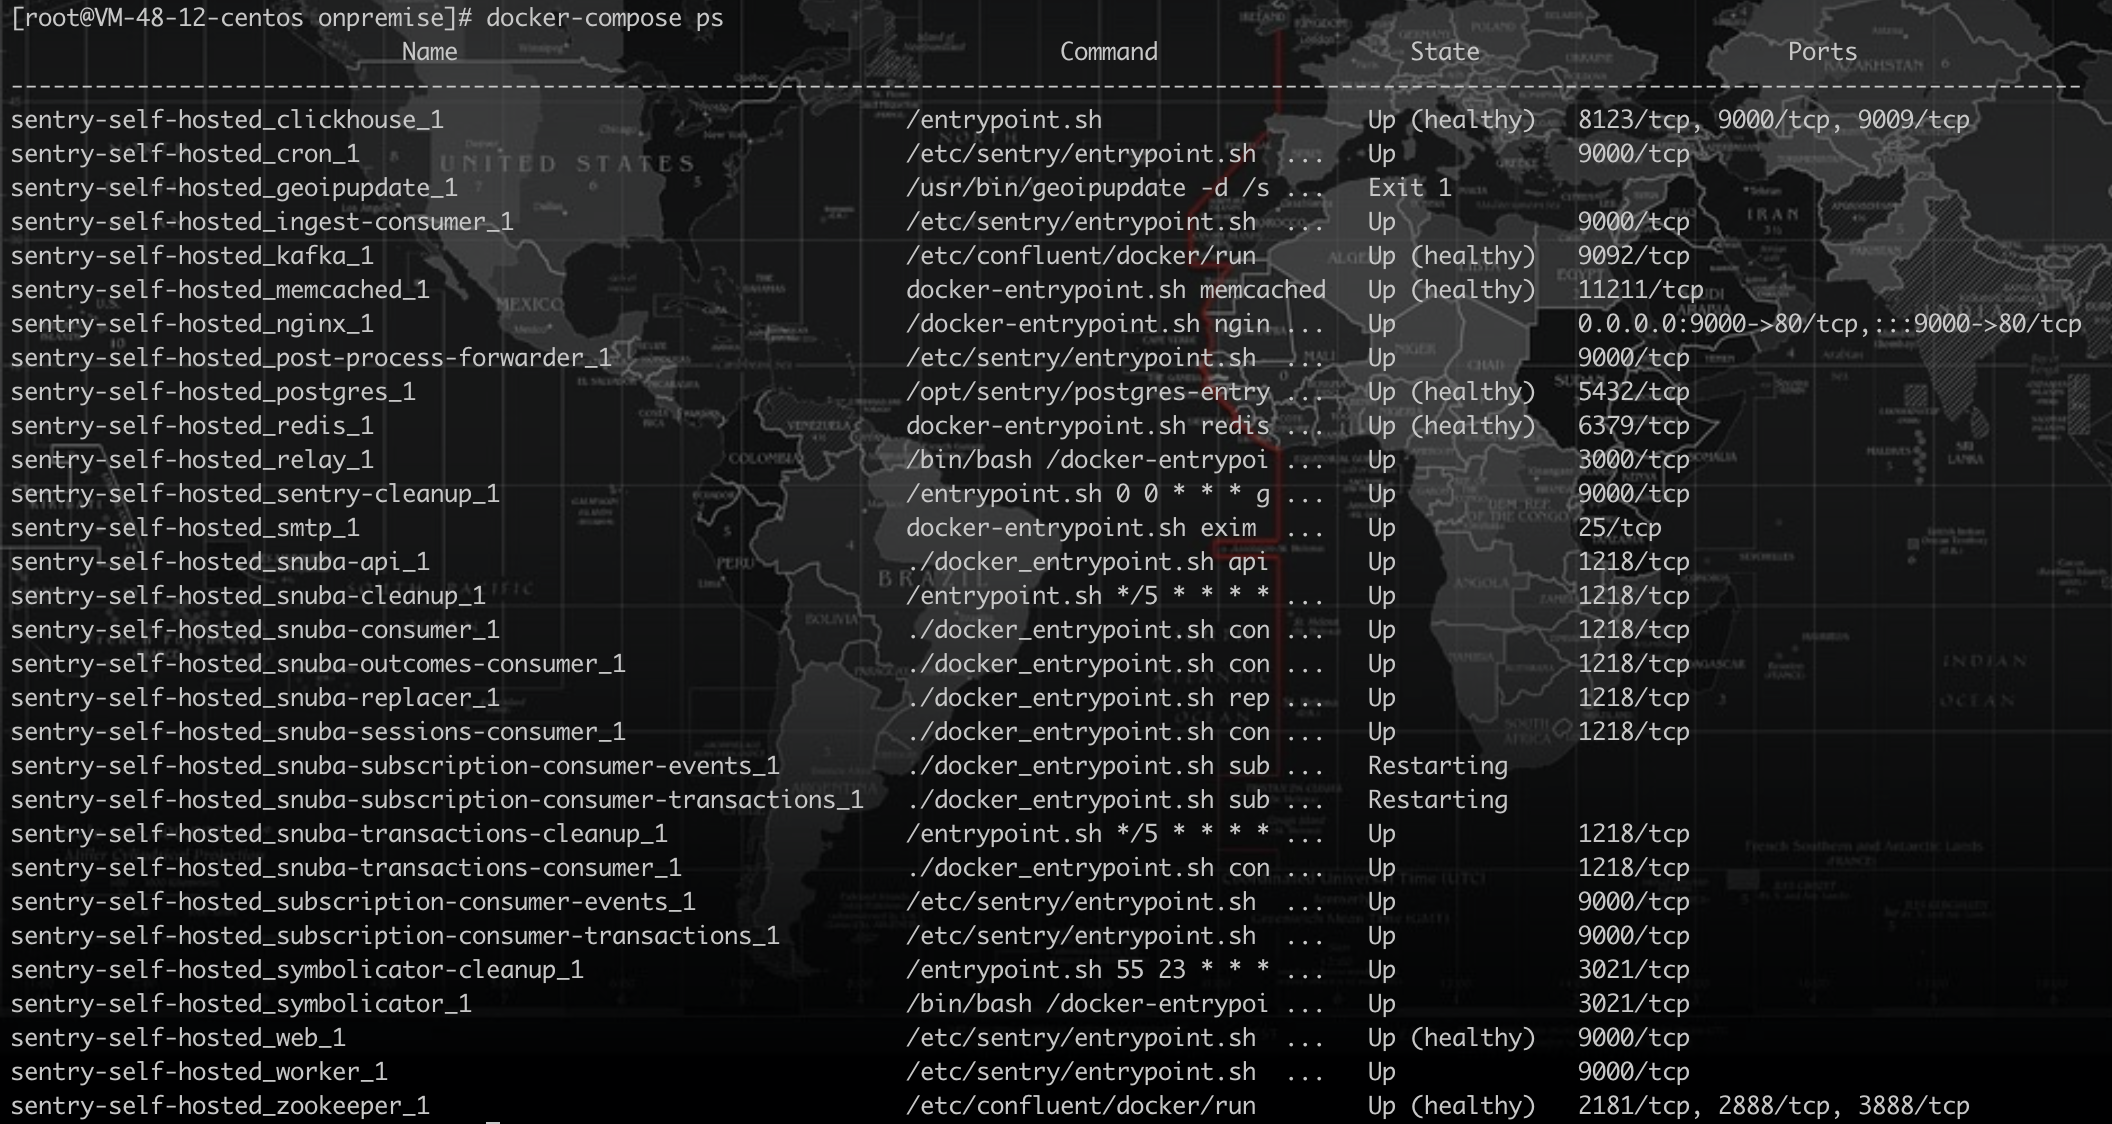
查看服务运行状态docker-compose ps
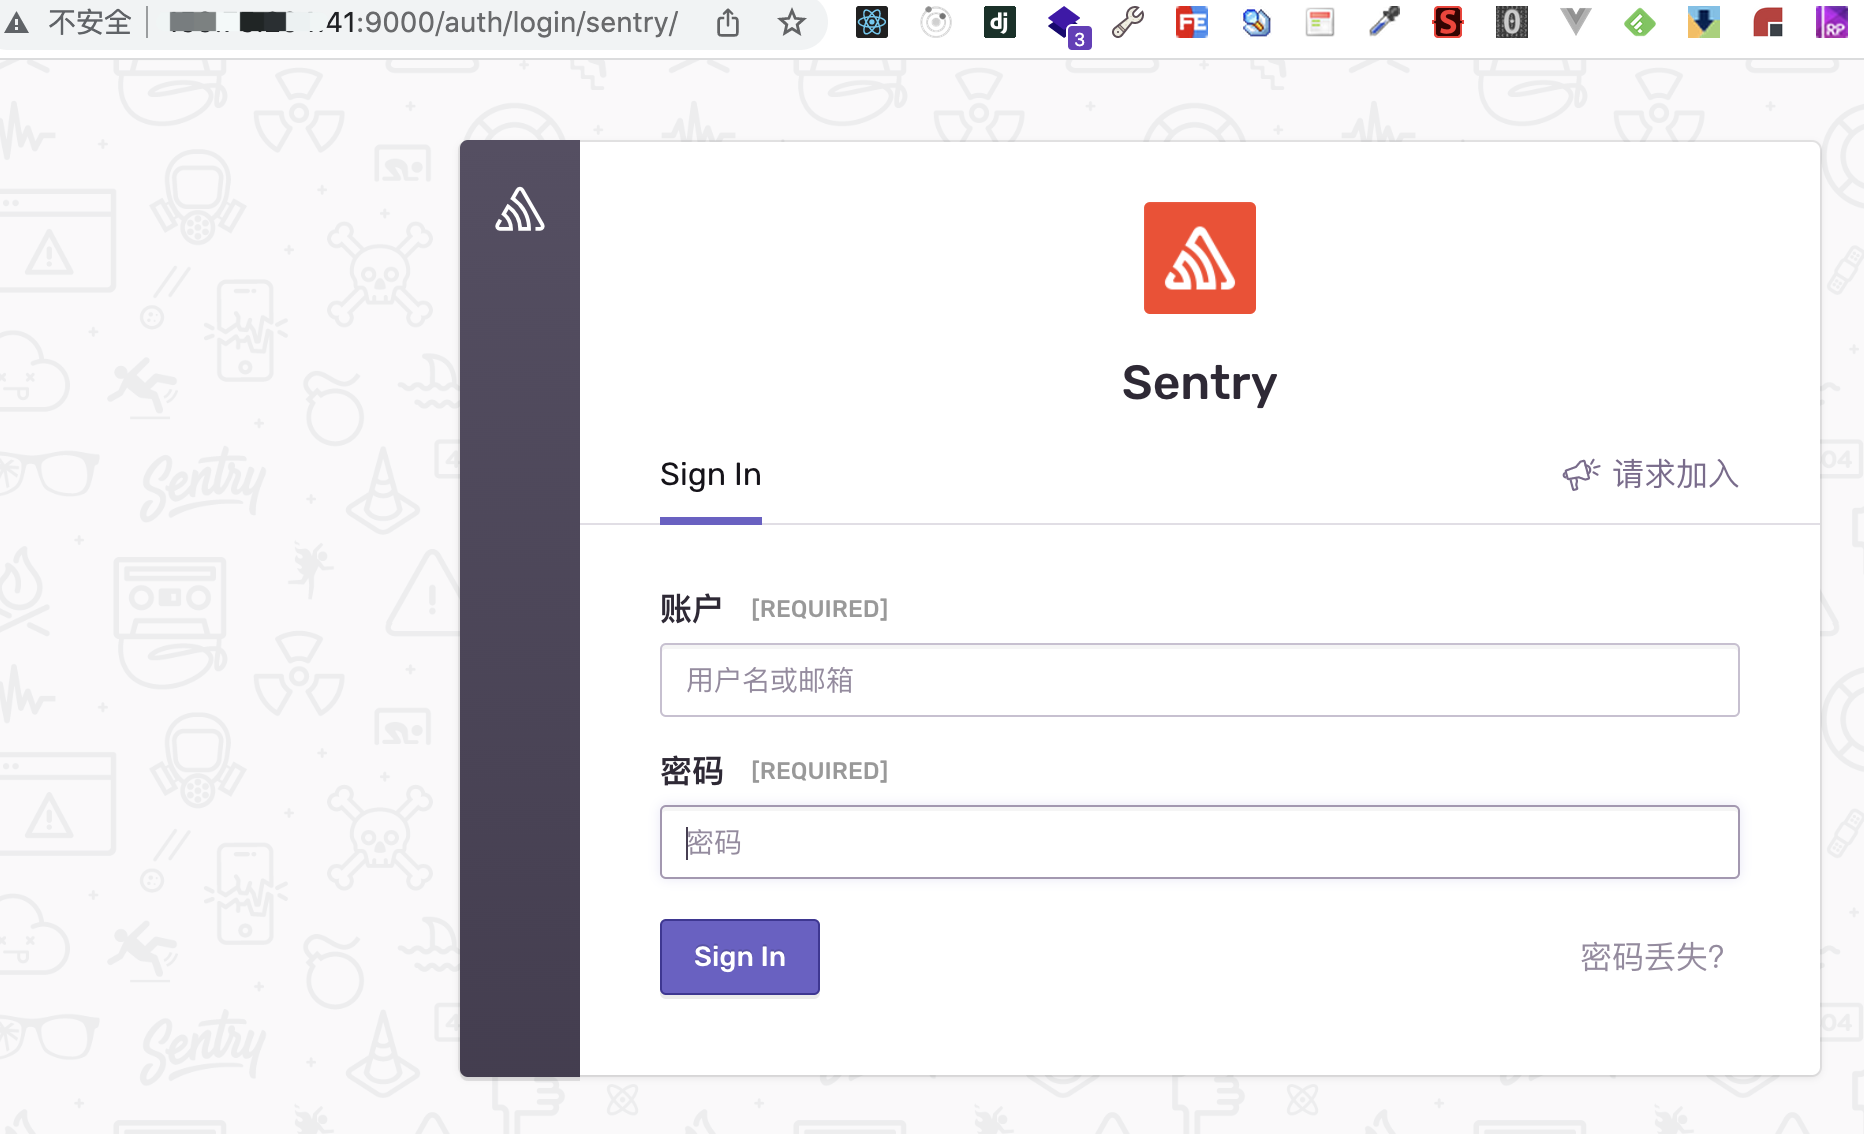
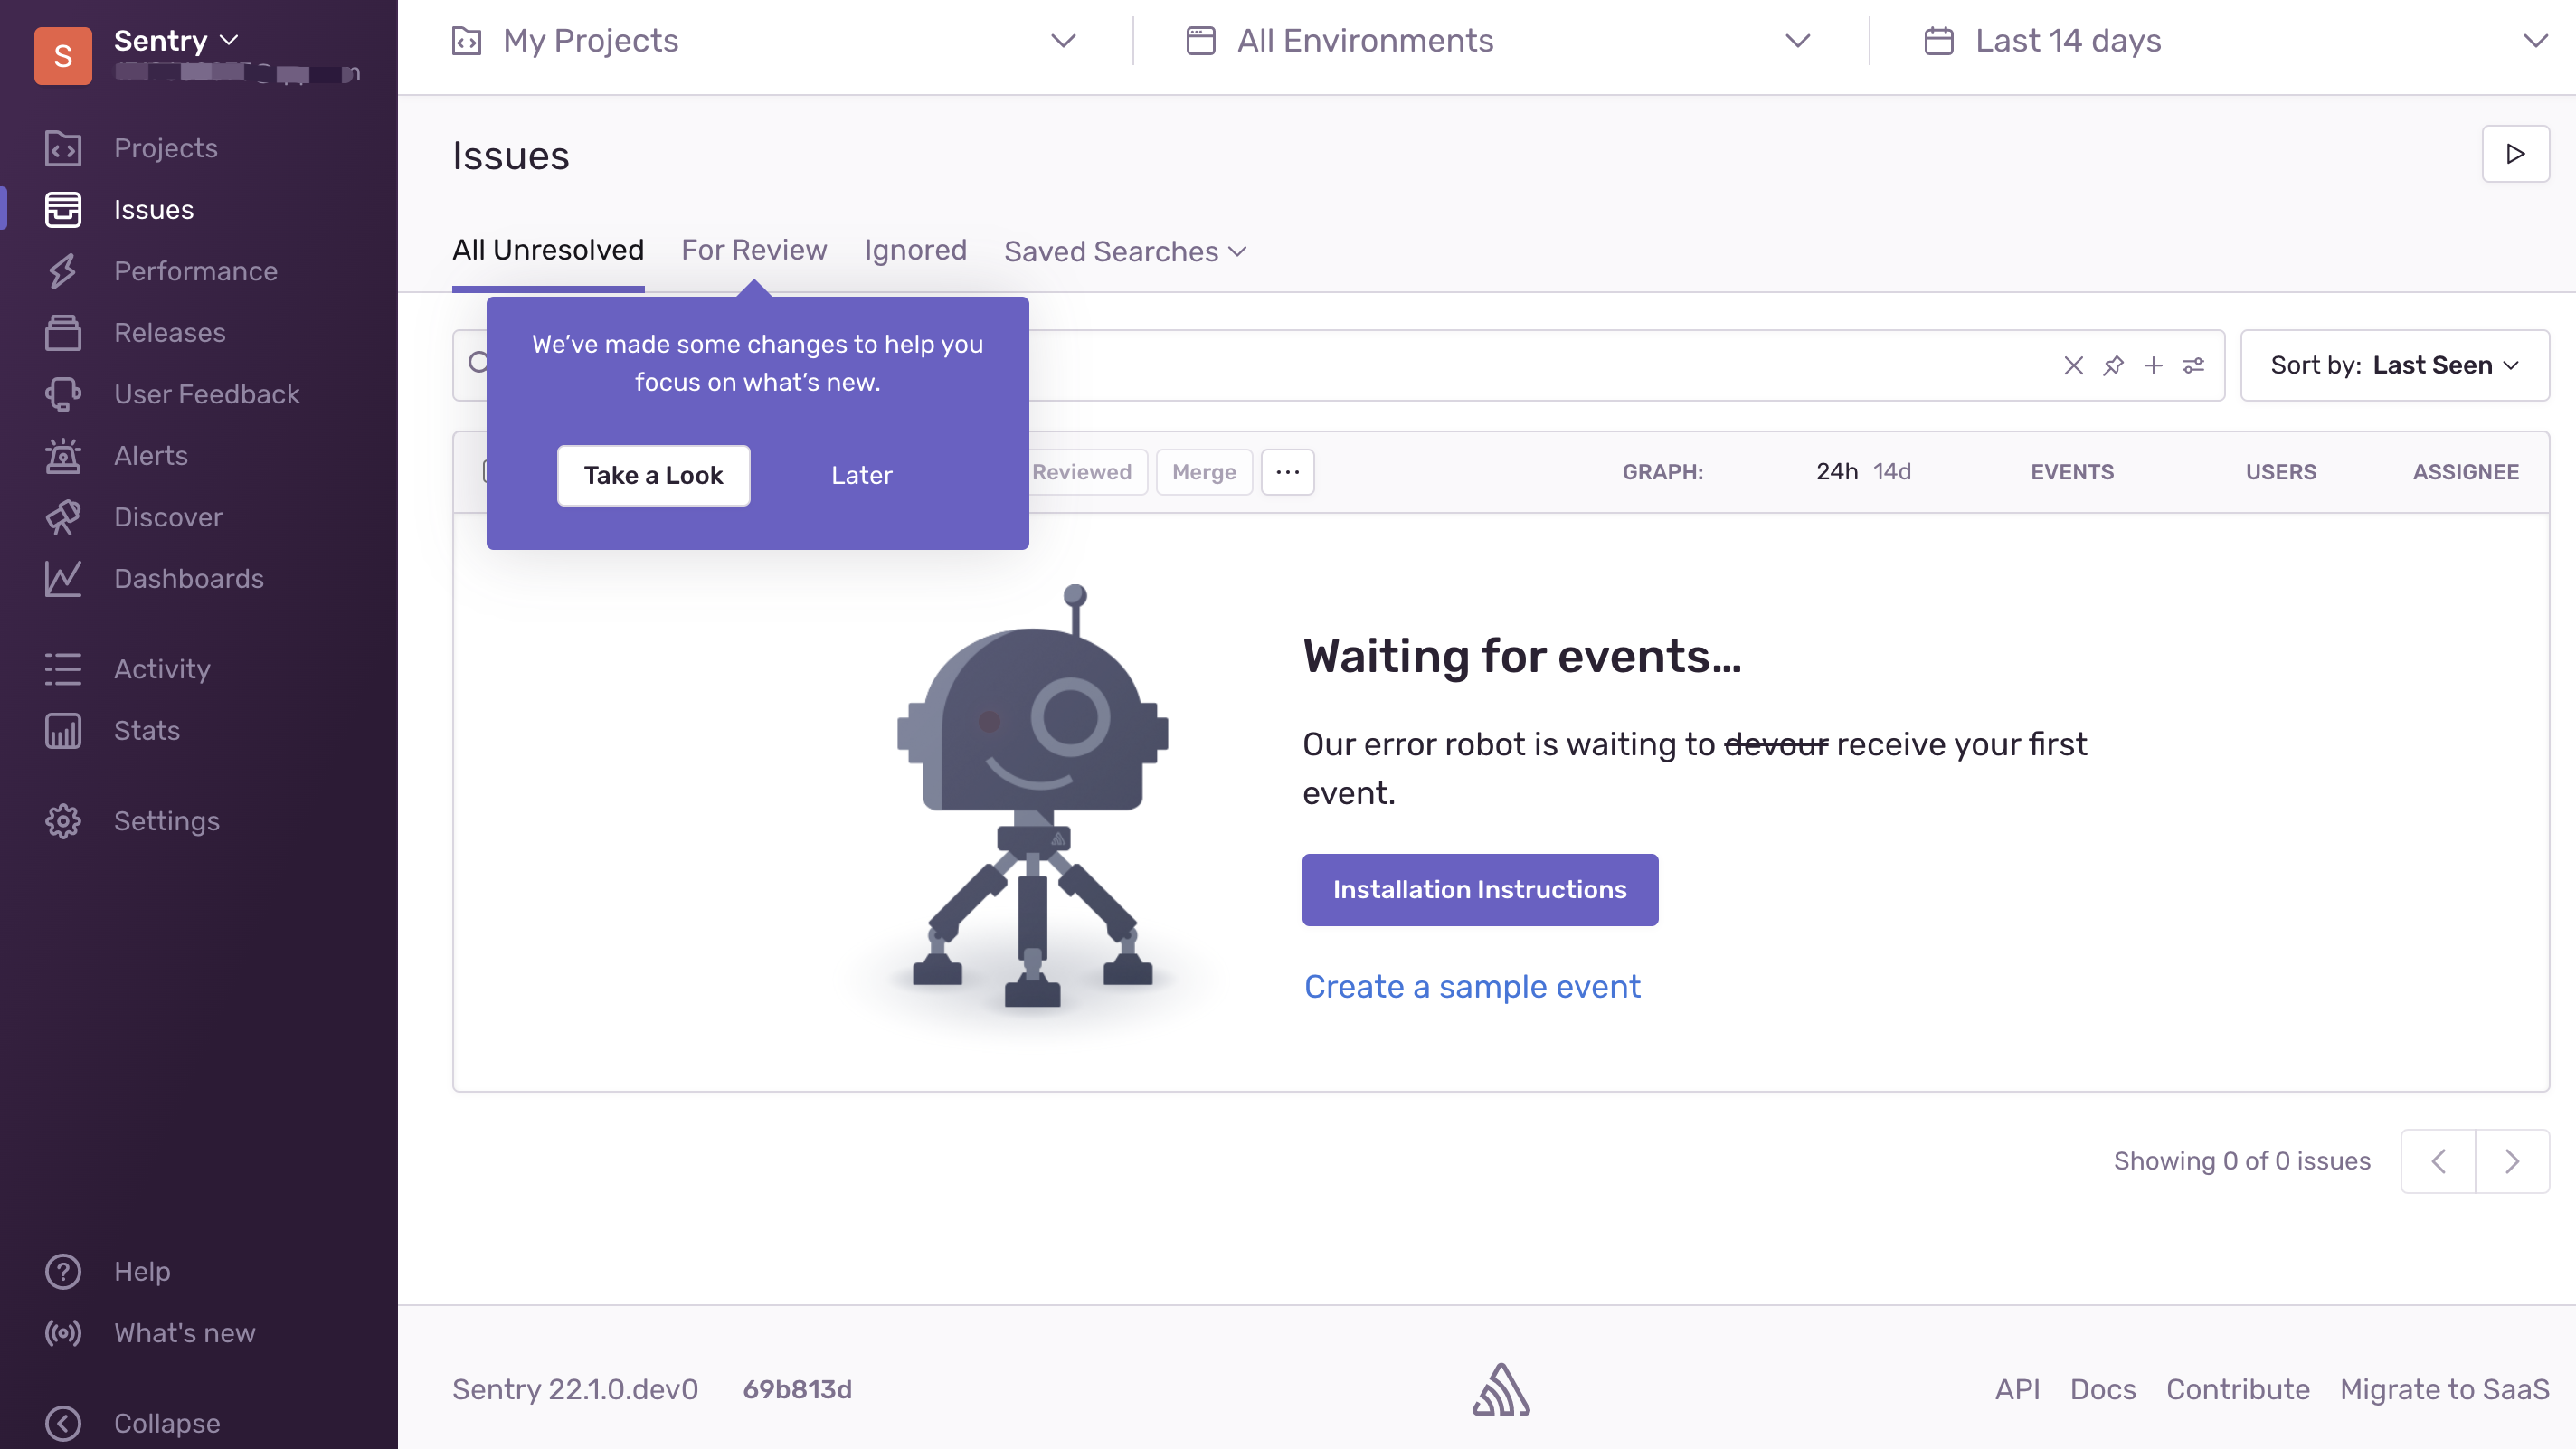
访问项目
所有服务都启动成功后,就可以访问
sentry后台了,后台默认运行在服务器的9000端口,这里的账户密码就是安装时让你设置的那个
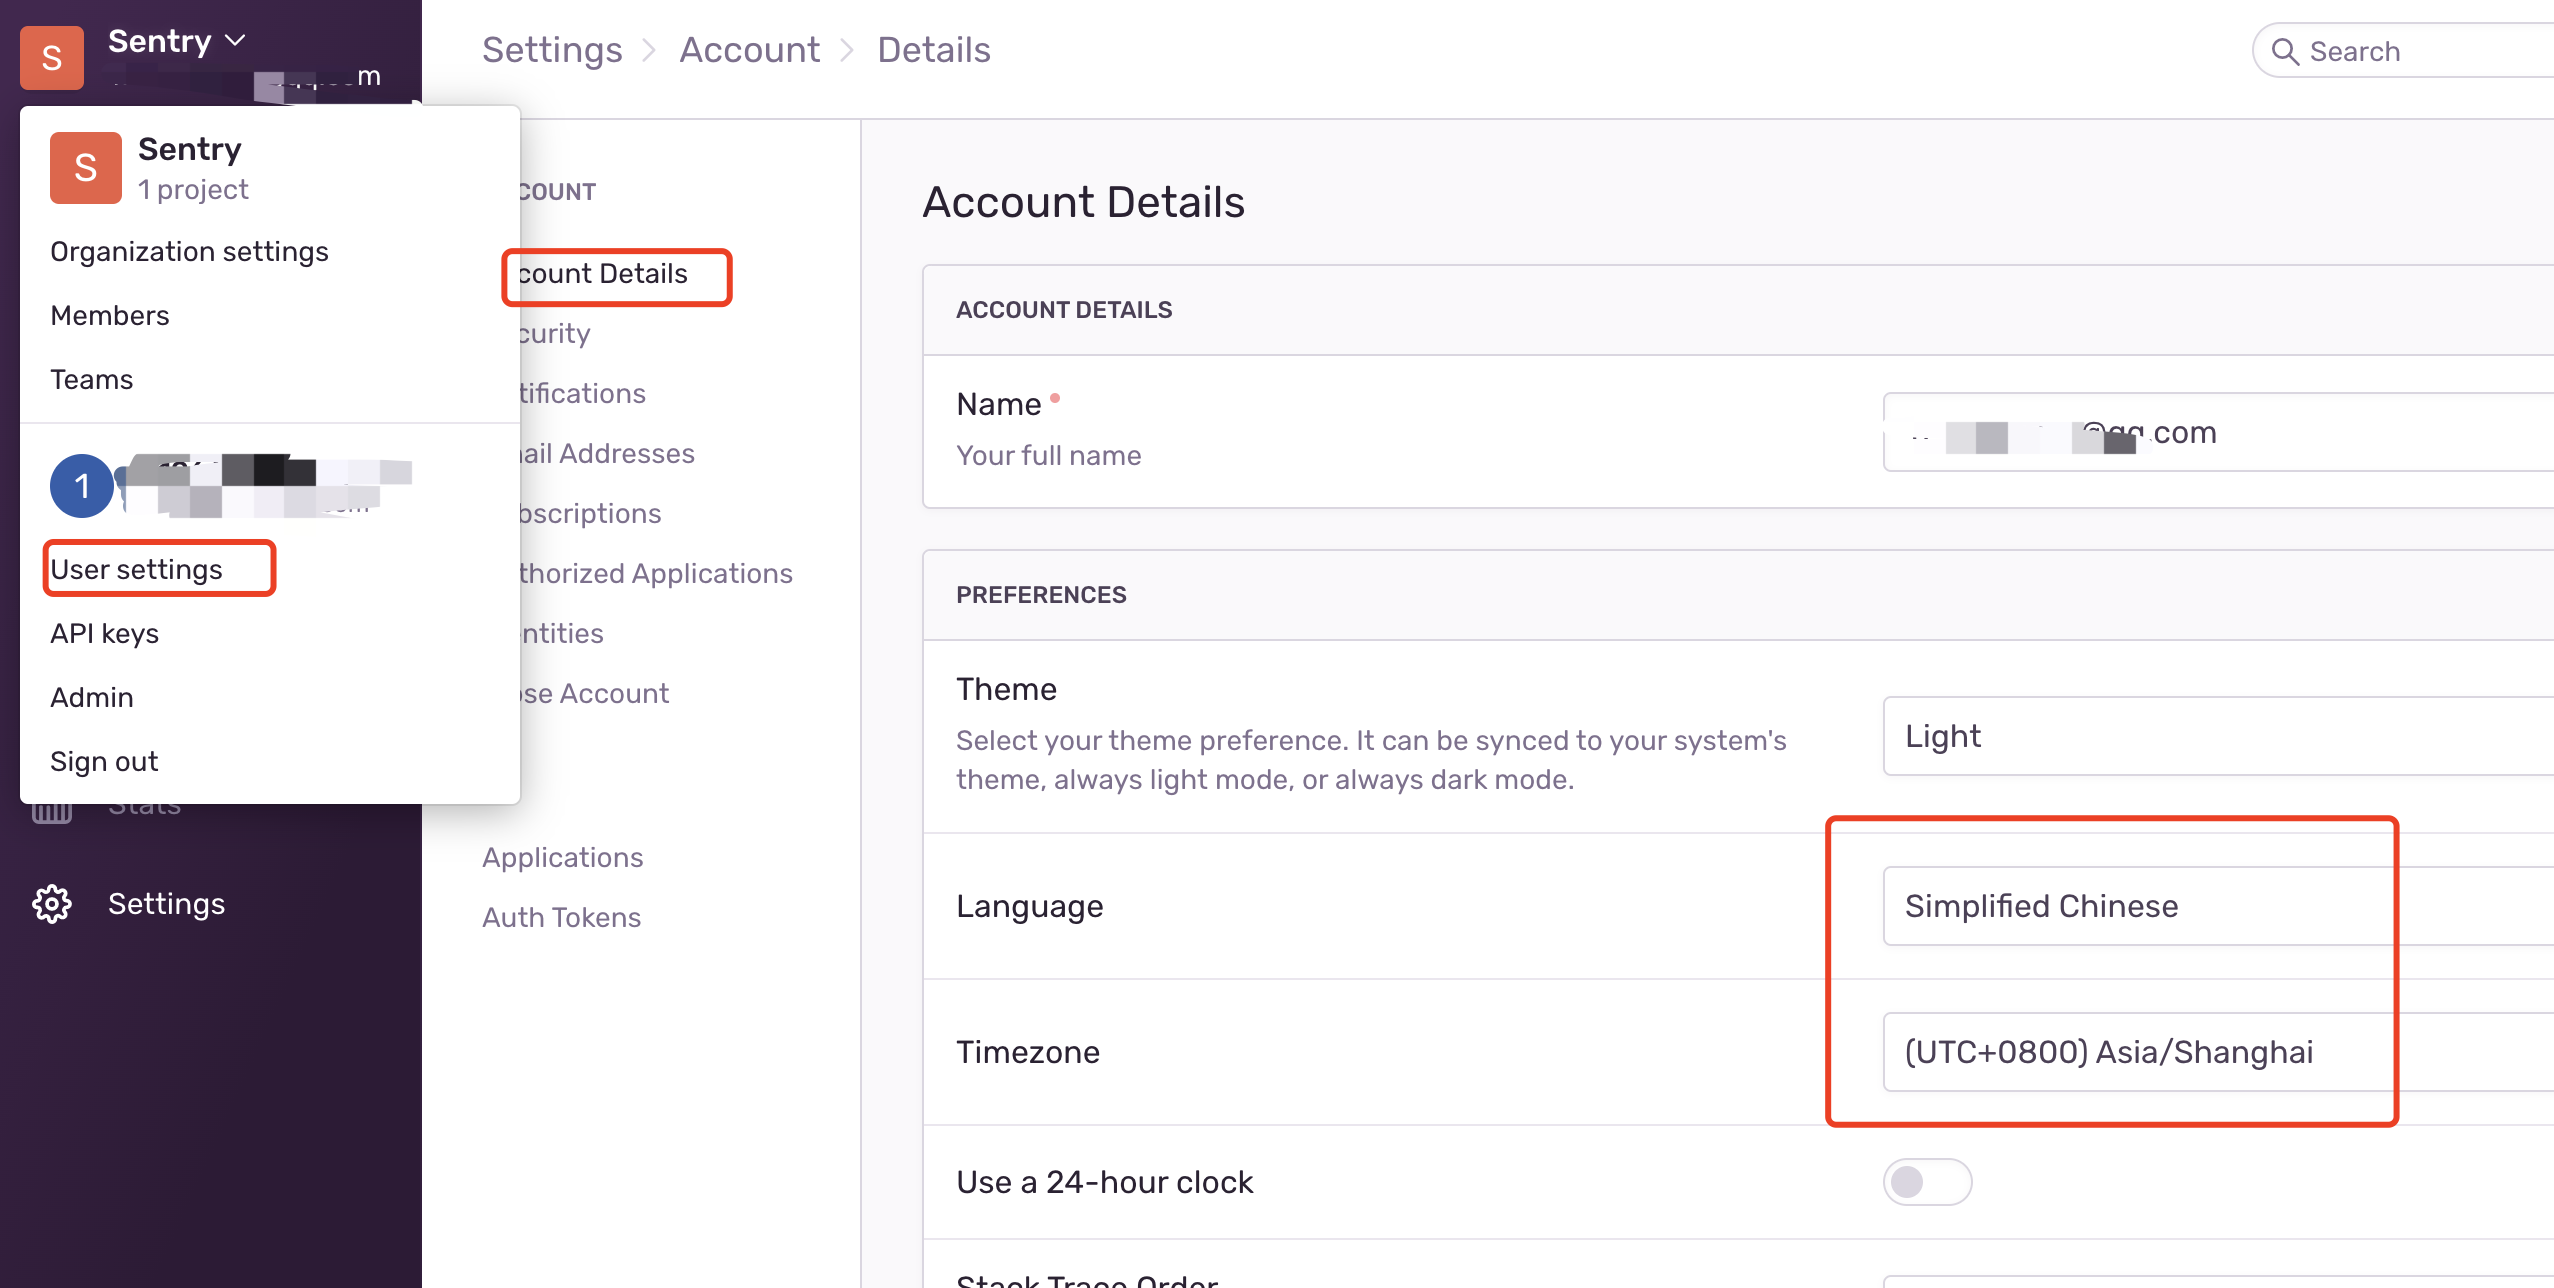
设置语言和时区
点击头像User settings - Account Details的相应菜单设置,刷新后生效
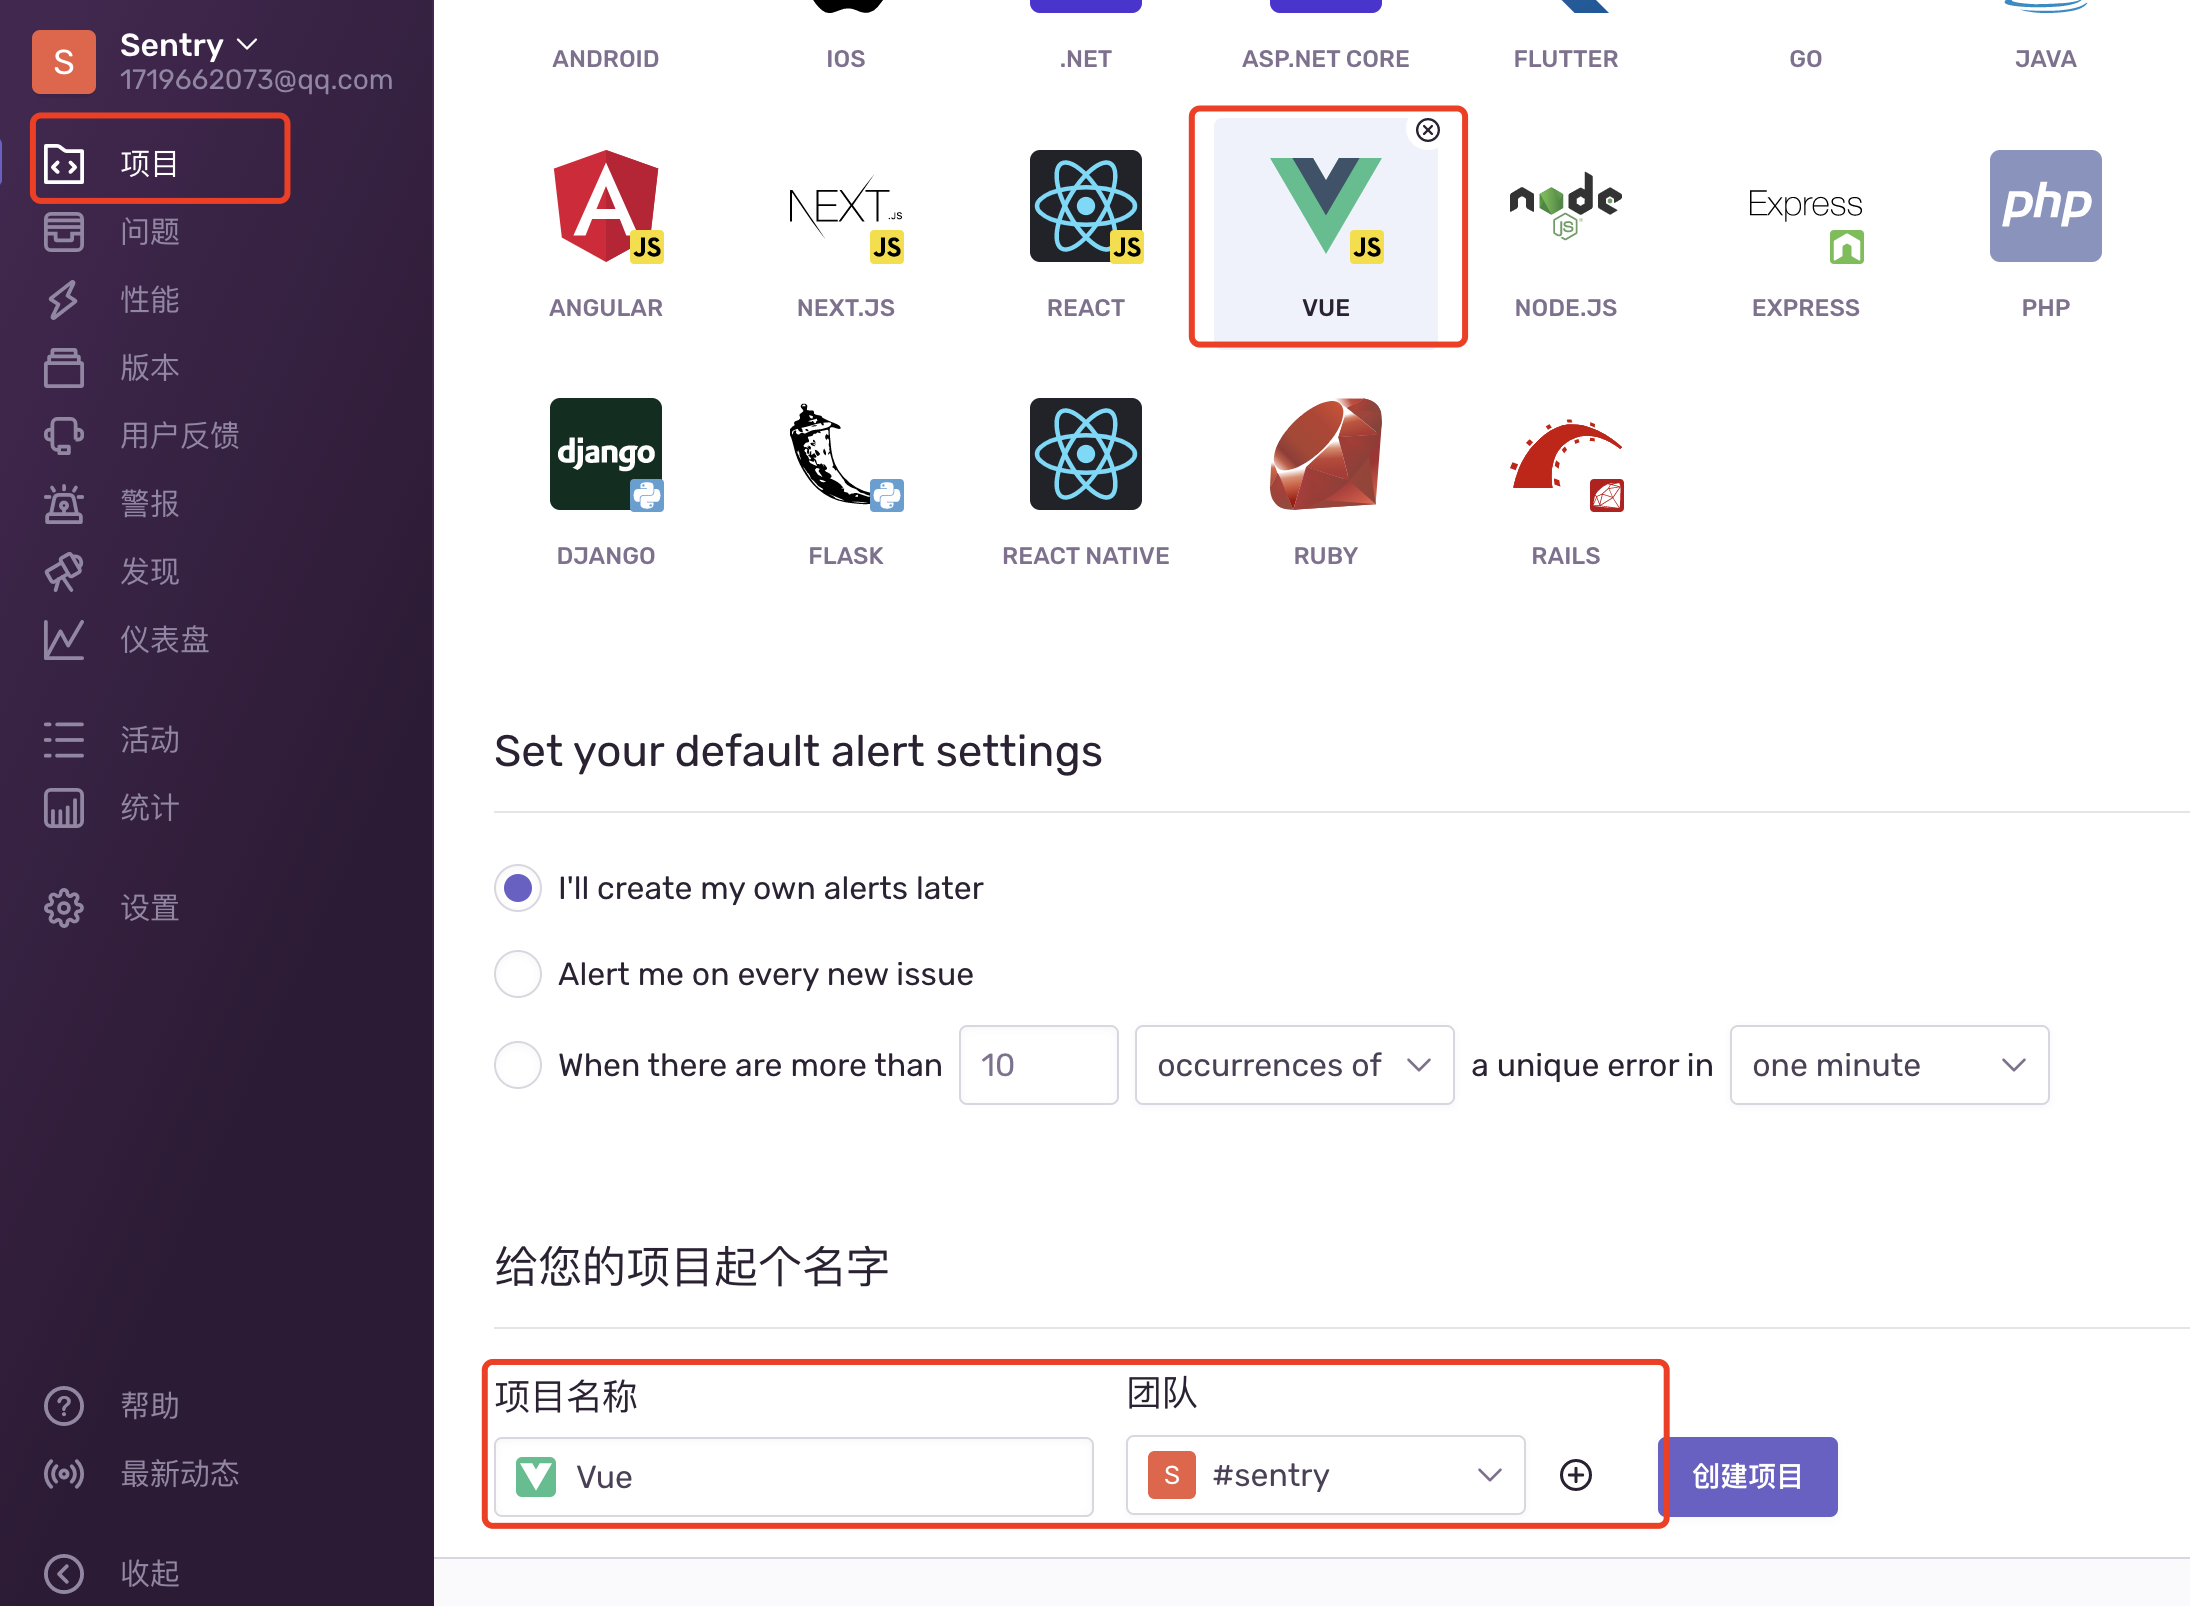
Vue2 + Sentry
创建一个vue项目
npm i @vue/cli -g

# 初始化vue2项目
vue create vue2-sentry
接入sentry
# Using npm
npm install --save @sentry/vue @sentry/tracing
// src/main.js
import Vue from "vue";
import Router from "vue-router";
import * as Sentry from "@sentry/vue";
import { Integrations } from "@sentry/tracing";

Vue.use(Router);

const router = new Router({
  // ...
});

Sentry.init({
  Vue,
  dsn: "http://xdsdfafda21212@119.75.24.41:9000/2",
  integrations: [
    new Integrations.BrowserTracing({
      routingInstrumentation: Sentry.vueRouterInstrumentation(router),
      tracingOrigins: ["localhost", "my-site-url.com", /^//],
    }),
  ],
  // 不同的环境上报到不同的 environment 分类
  // environment: process.env.ENVIRONMENT,
  // Set tracesSampleRate to 1.0 to capture 100%
  // of transactions for performance monitoring.
  // We recommend adjusting this value in production
  //  高访问量应用可以控制上报百分比
  tracesSampleRate: 1.0,
  release: process.env.SENTRY_VERSION || '0.0.1', // 版本号,每次都npm run build上传都修改版本号
});

// ...

new Vue({
  router,
  render: h => h(App),
}).$mount("#app");
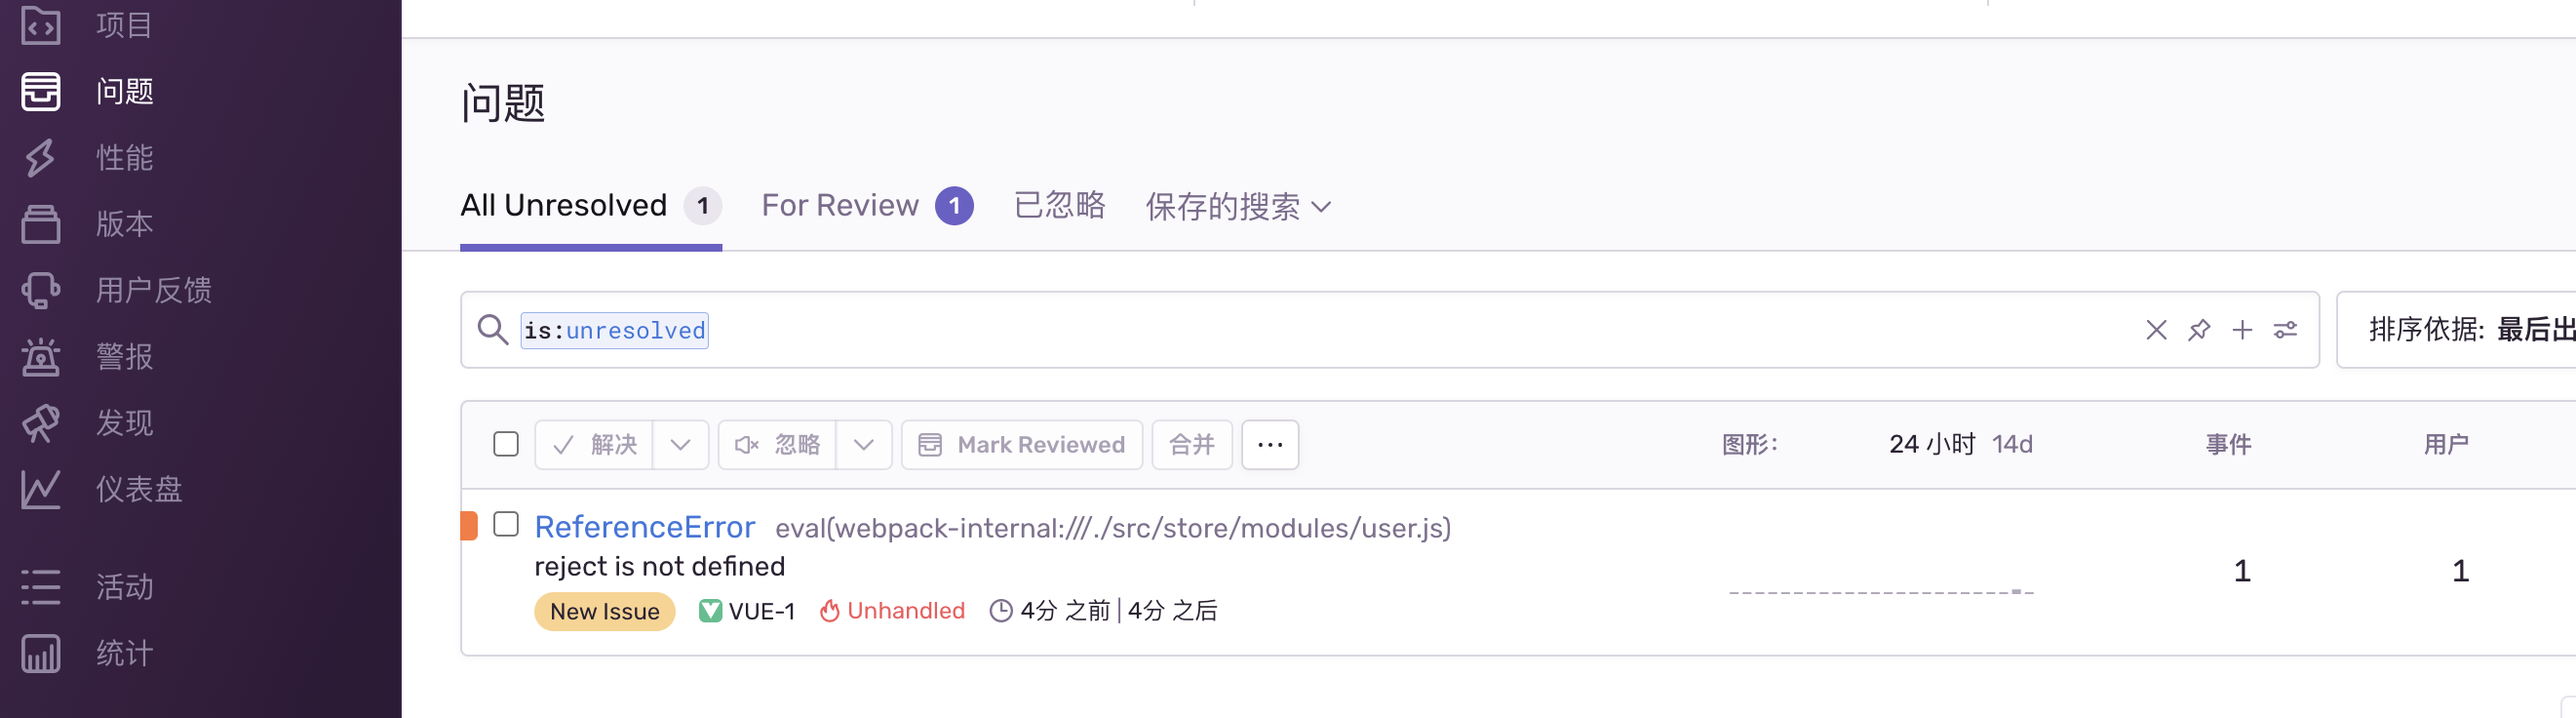
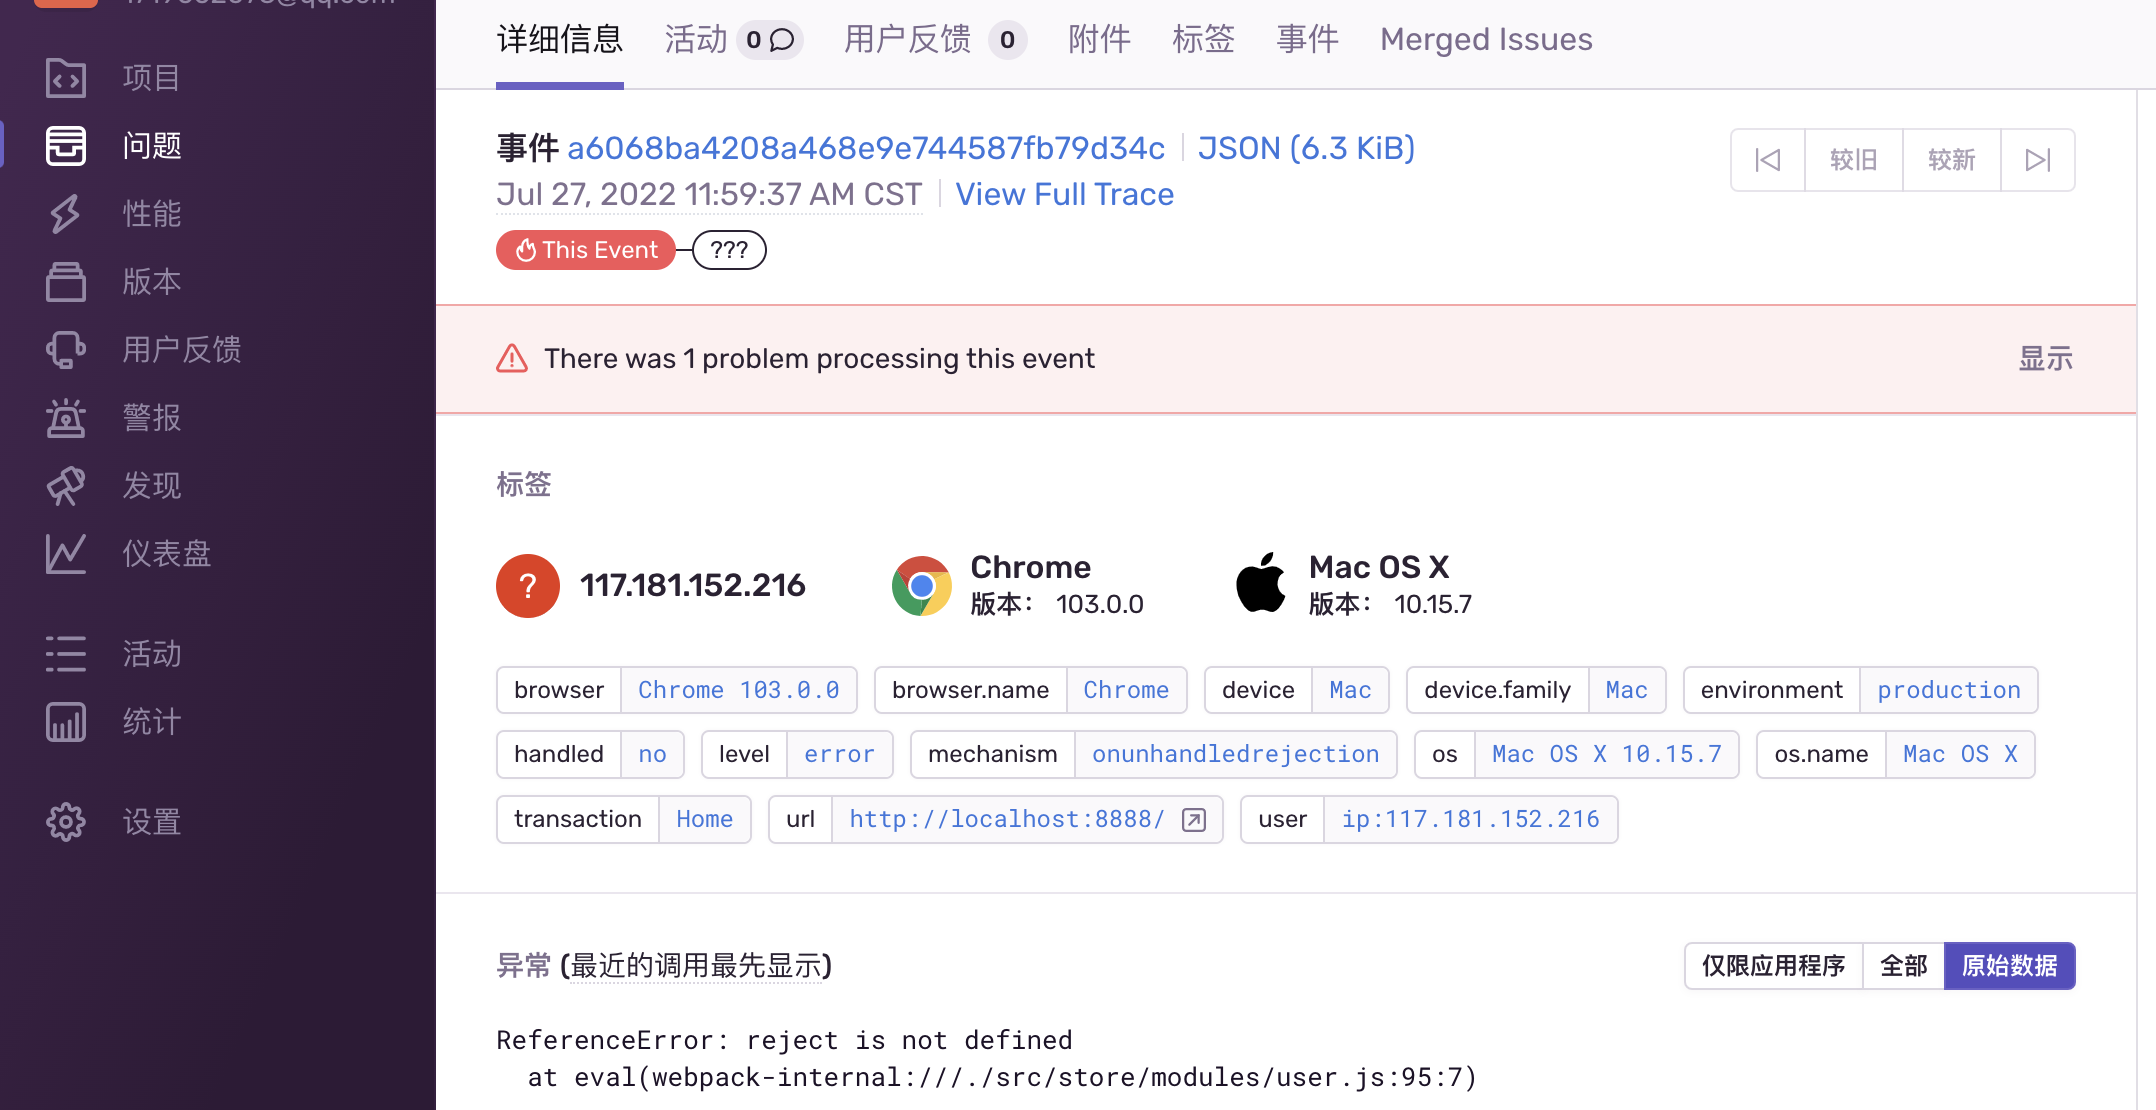
我们手动抛出异常,在控制台可见捕获了错误
上传sourceMap到sentry
为了方便查看具体的报错内容,我们需要上传sourceMap到sentry平台。一般有两种方式 sentry-cli和 sentry-webpack-plugin方式,这里为了方便采用webpack方式
-
source-map是一个文件,可以让已编译过的代码可以映射出原始源; -
source-map就是一个信息文件,里面储存着位置信息。也就是说,转换后的代码的每一个位置,所对应的转换前的位置。
webpack方式上传
npm i @sentry/webpack-plugin -D
修改vue.config.js配置文件
// vue.config.js

const SentryCliPlugin = require('@sentry/webpack-plugin')

module.exports = {
  // 打包生成sourcemap,打包完上传到sentry之后在删除,不要把sourcemao传到生产环境
  productionSourceMap: process.env.NODE_ENV !== 'development',
  configureWebpack: config=> {
    if (process.env.NODE_ENV !== 'development') {
      config.plugins.push(
        new SentryCliPlugin({
          include: './dist/js', // 只上传js
          ignore: ['node_modules', 'webpack.config.js'],
          ignoreFile: '.sentrycliignore',
          release: process.env.SENTRY_VERSION || '0.0.1', // 版本号,每次都npm run build上传都修改版本号 对应main.js中设置的Sentry.init版本号
          cleanArtifacts: true, // Remove all the artifacts in the release before the upload.
          // URL prefix to add to the beginning of all filenames. Defaults to ~/ but you might want to set this to the full URL. This is also useful if your files are stored in a sub folder. eg: url-prefix '~/static/js'
          urlPrefix: '~/js', // 线上对应的url资源的相对路径 注意修改这里,否则上传sourcemap还原错误信息有问题
          // urlPrefix: 关于这个,是要看你线上项目的资源地址,比如
          // 怎么看资源地址呢, 例如谷歌浏览器, F12控制台, 或者去Application里面找到对应资源打开
        }),
      )
    }
  },
}
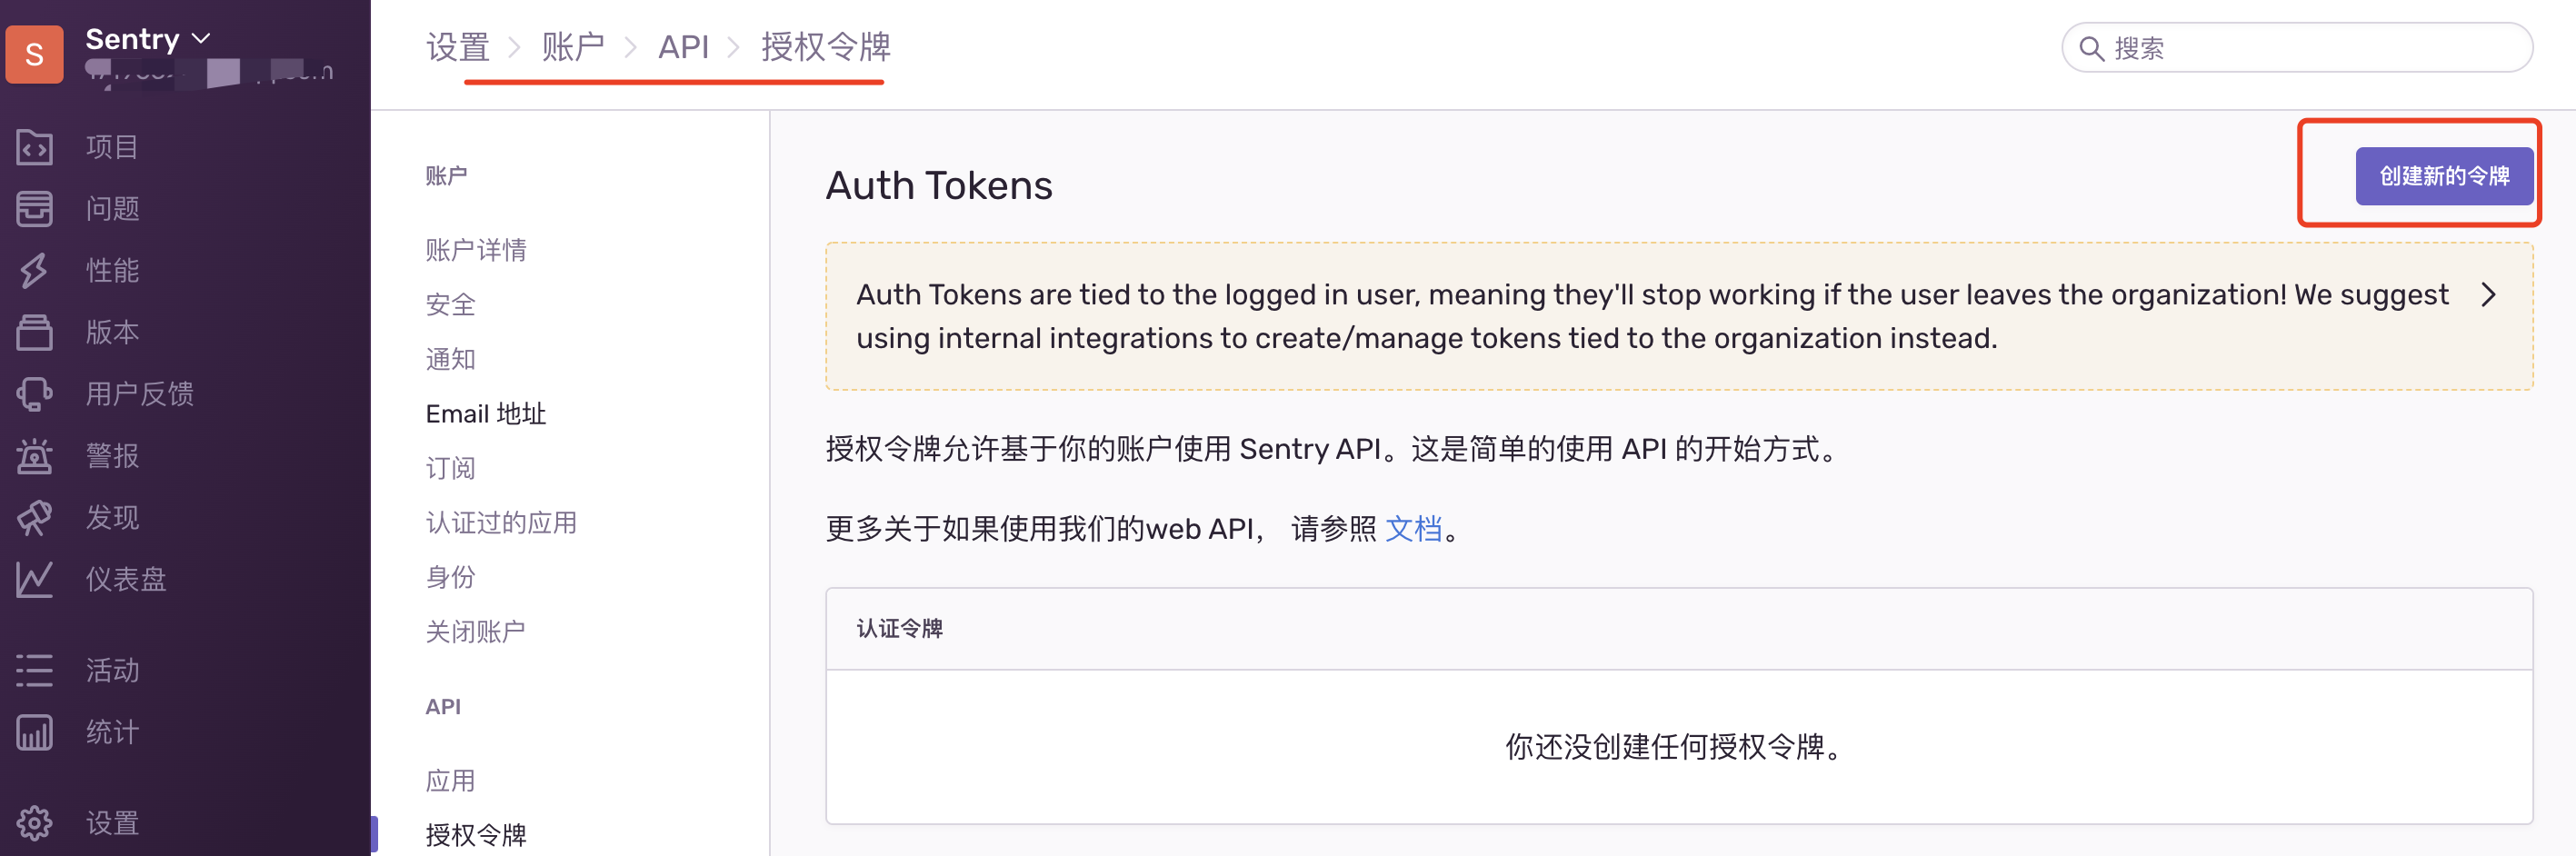
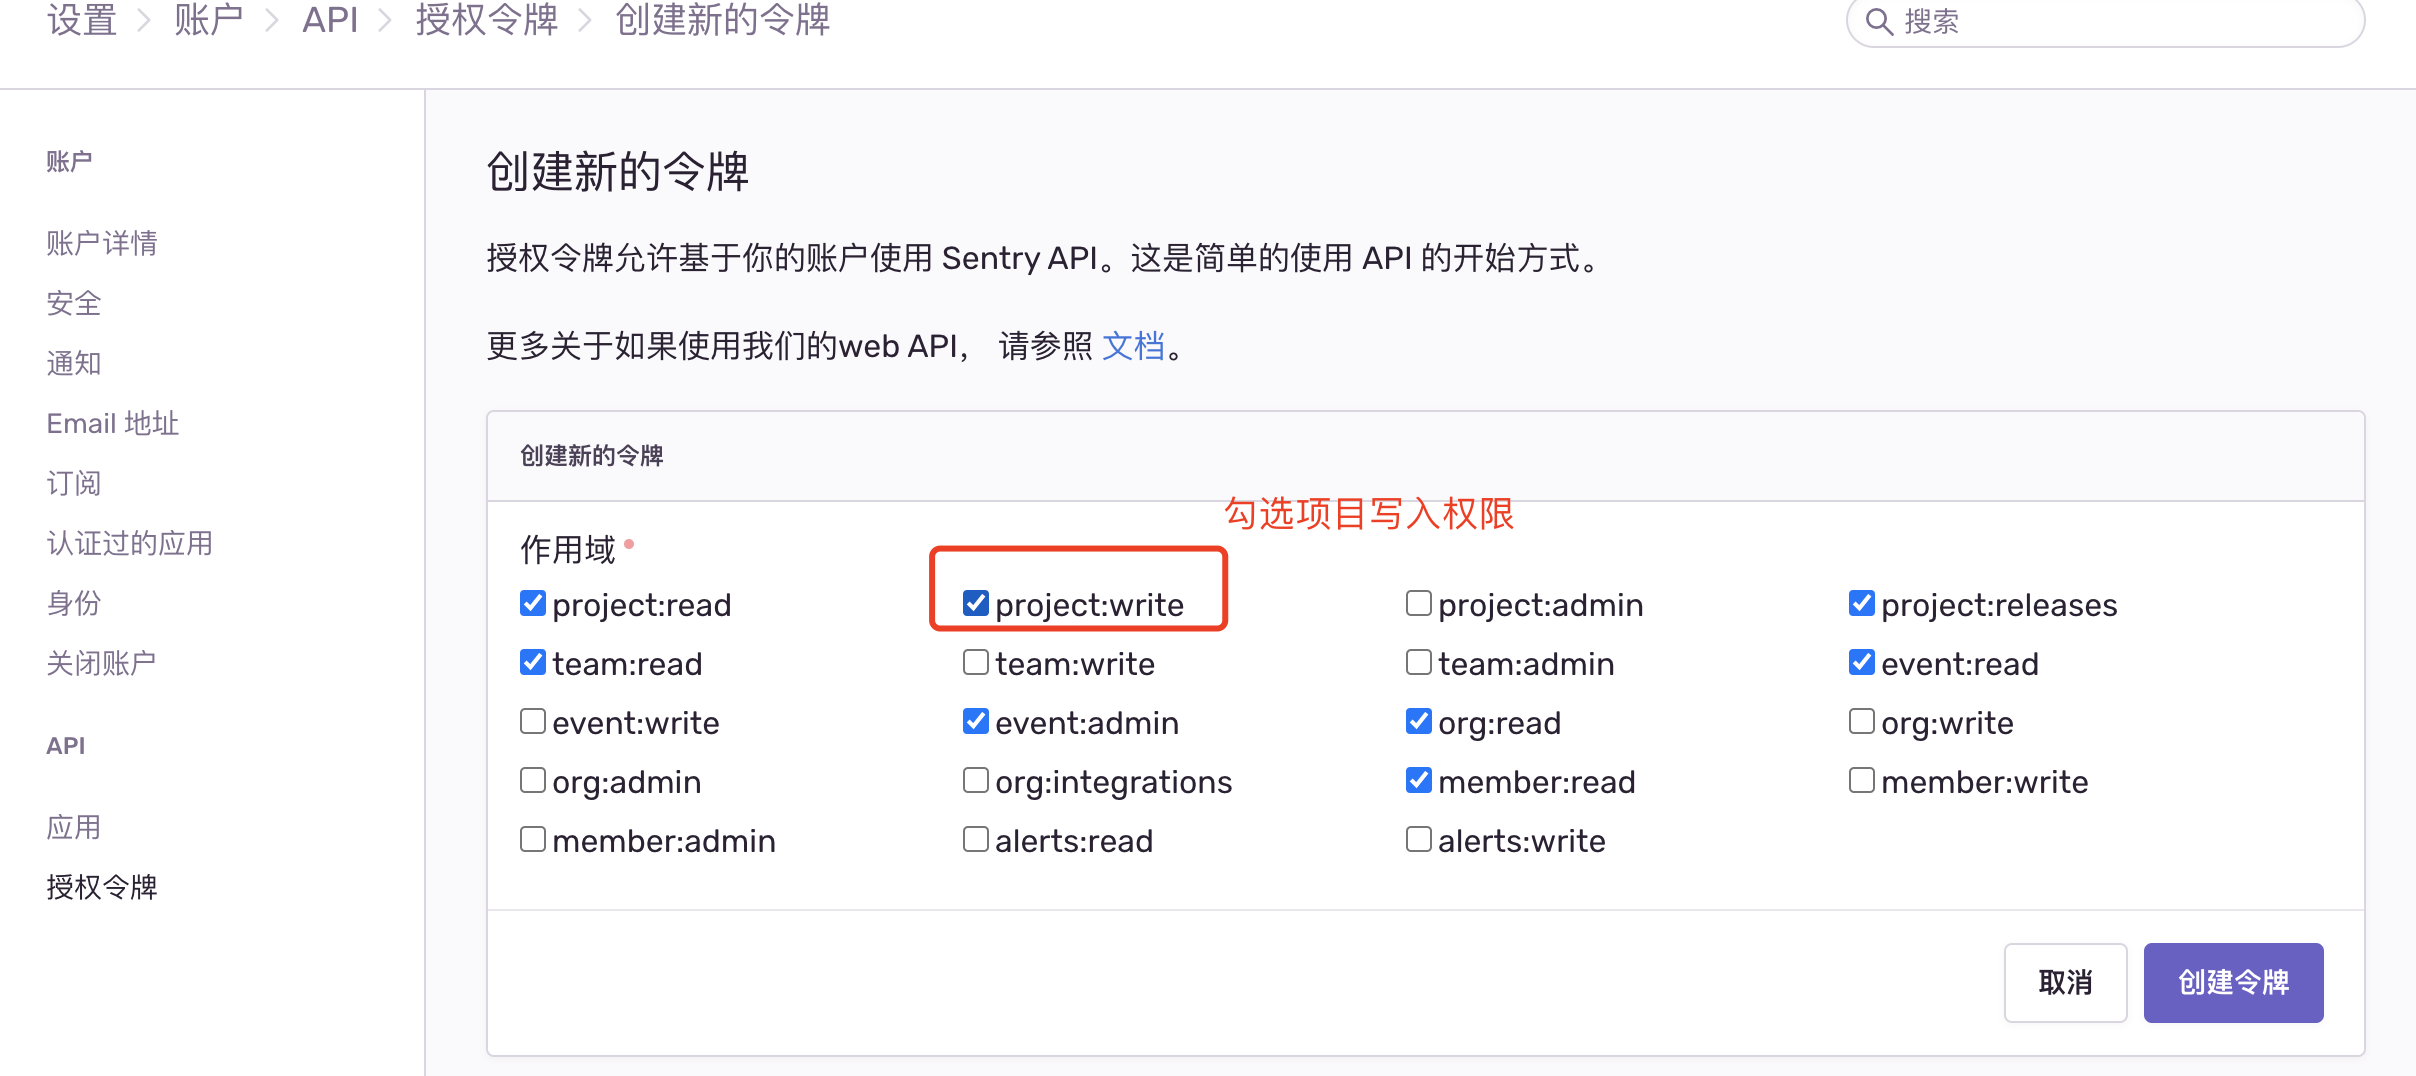
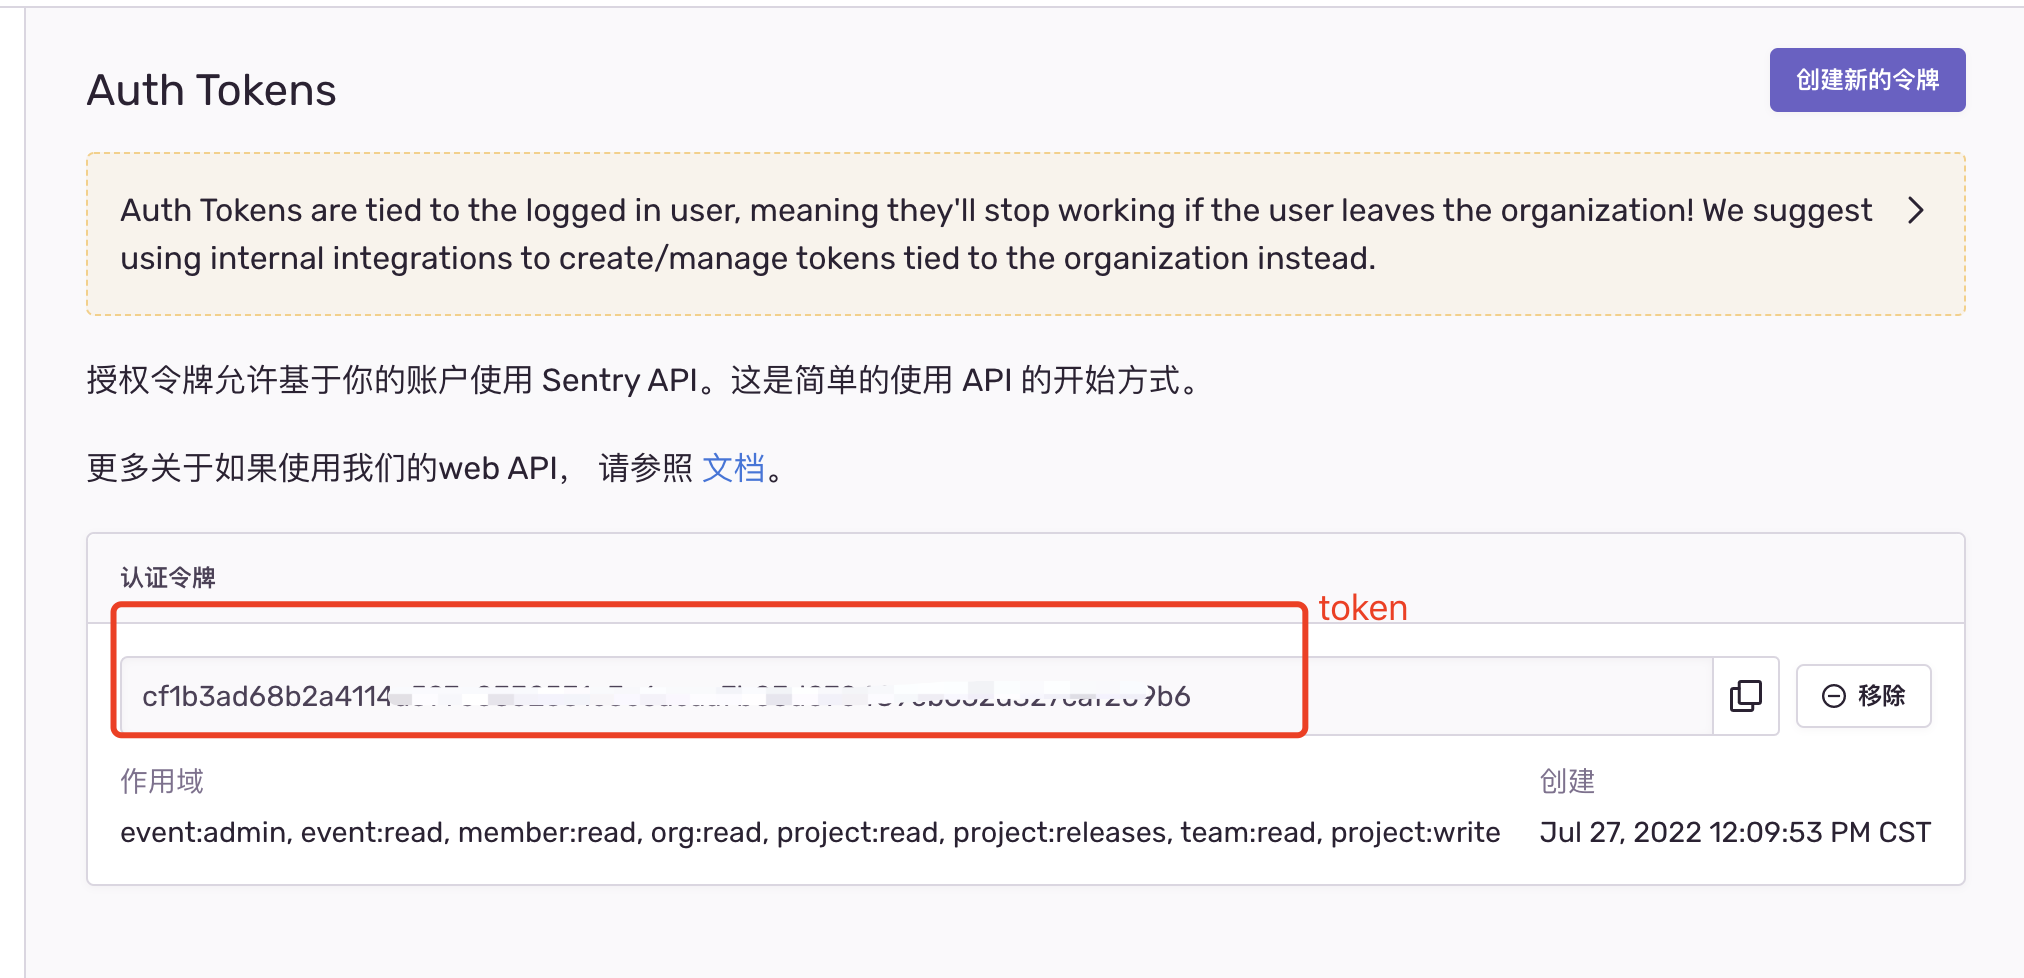
获取TOKEN
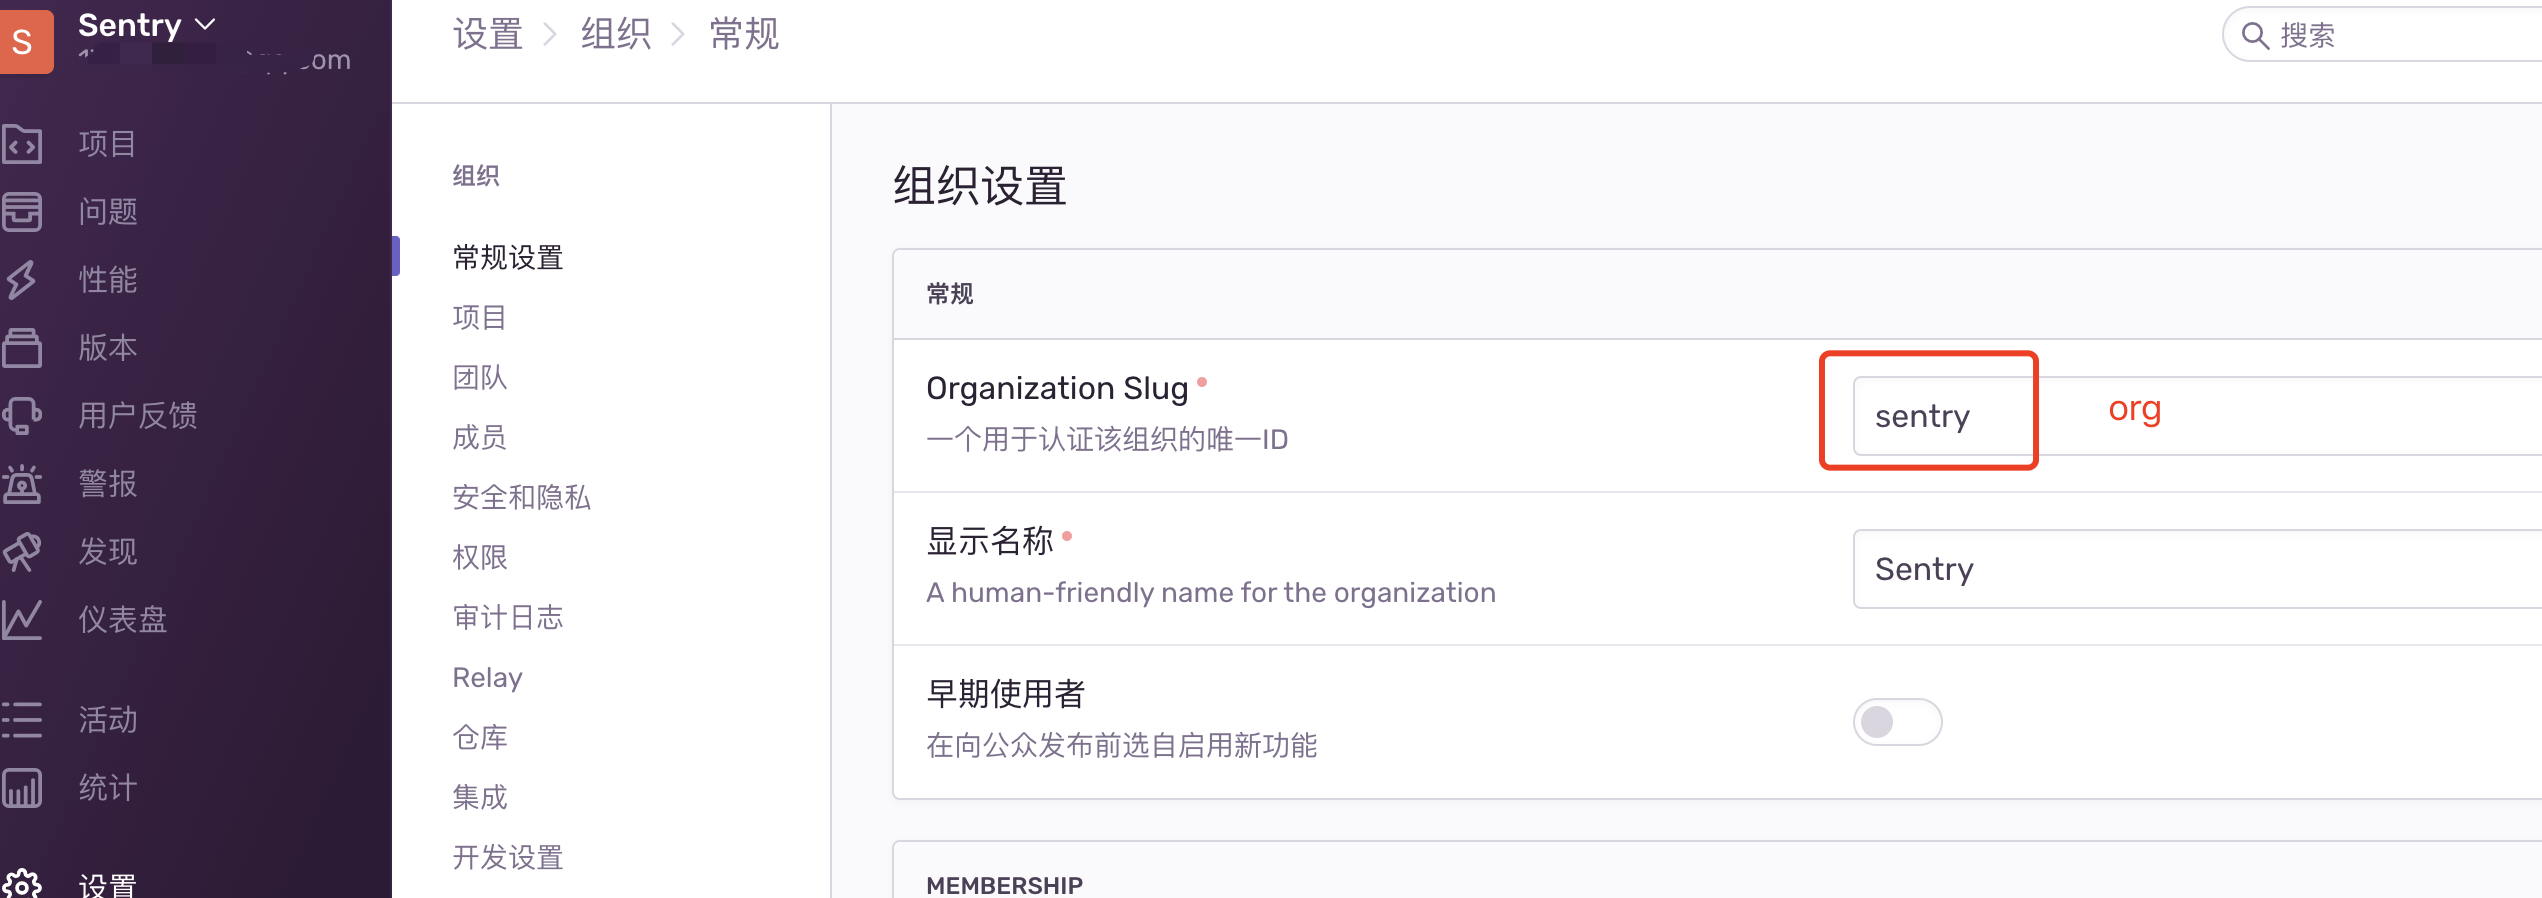
获取org

在项目根目录创建.sentryclirc
-
url:sentry部署的地址,默认是https://sentry.io/ -
org:控制台查看组织名称 -
project:项目名称 -
token:生成token需要勾选project:write项目写入权限
# .sentryclirc

[auth]
token=填入控制台创建的TOKEN

[defaults]
url=https://sentry.io/
org=sentry
project=vue
执行项目打包命令,即可把js下的sourcemap相关文件上传到sentry
npm run build
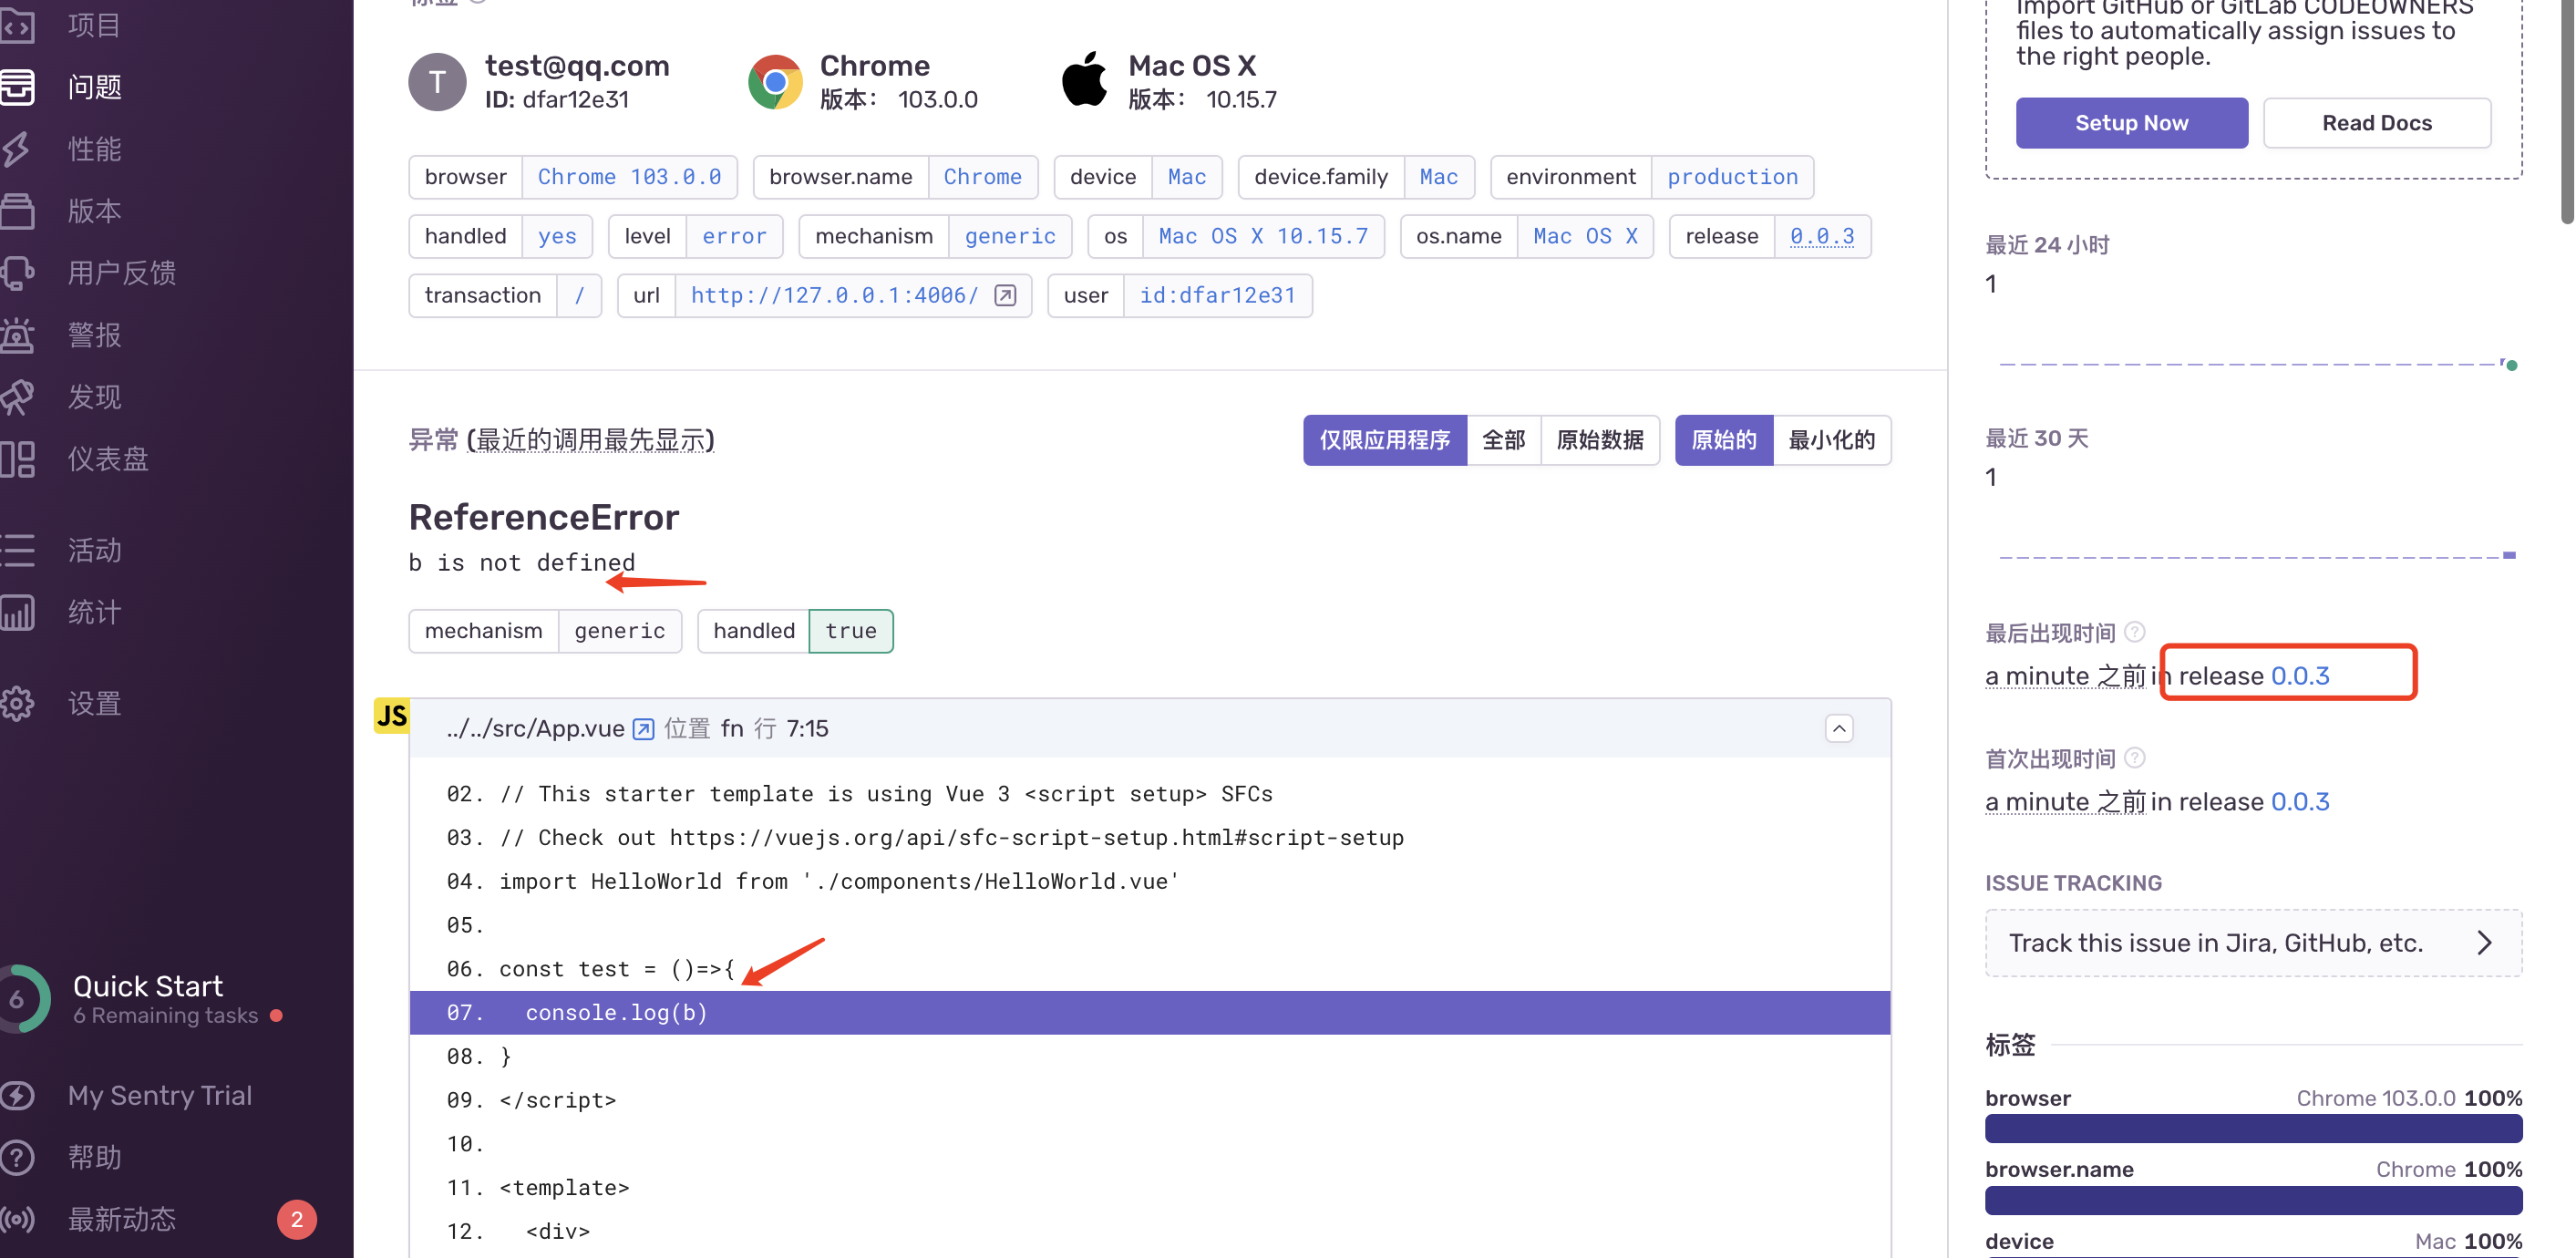
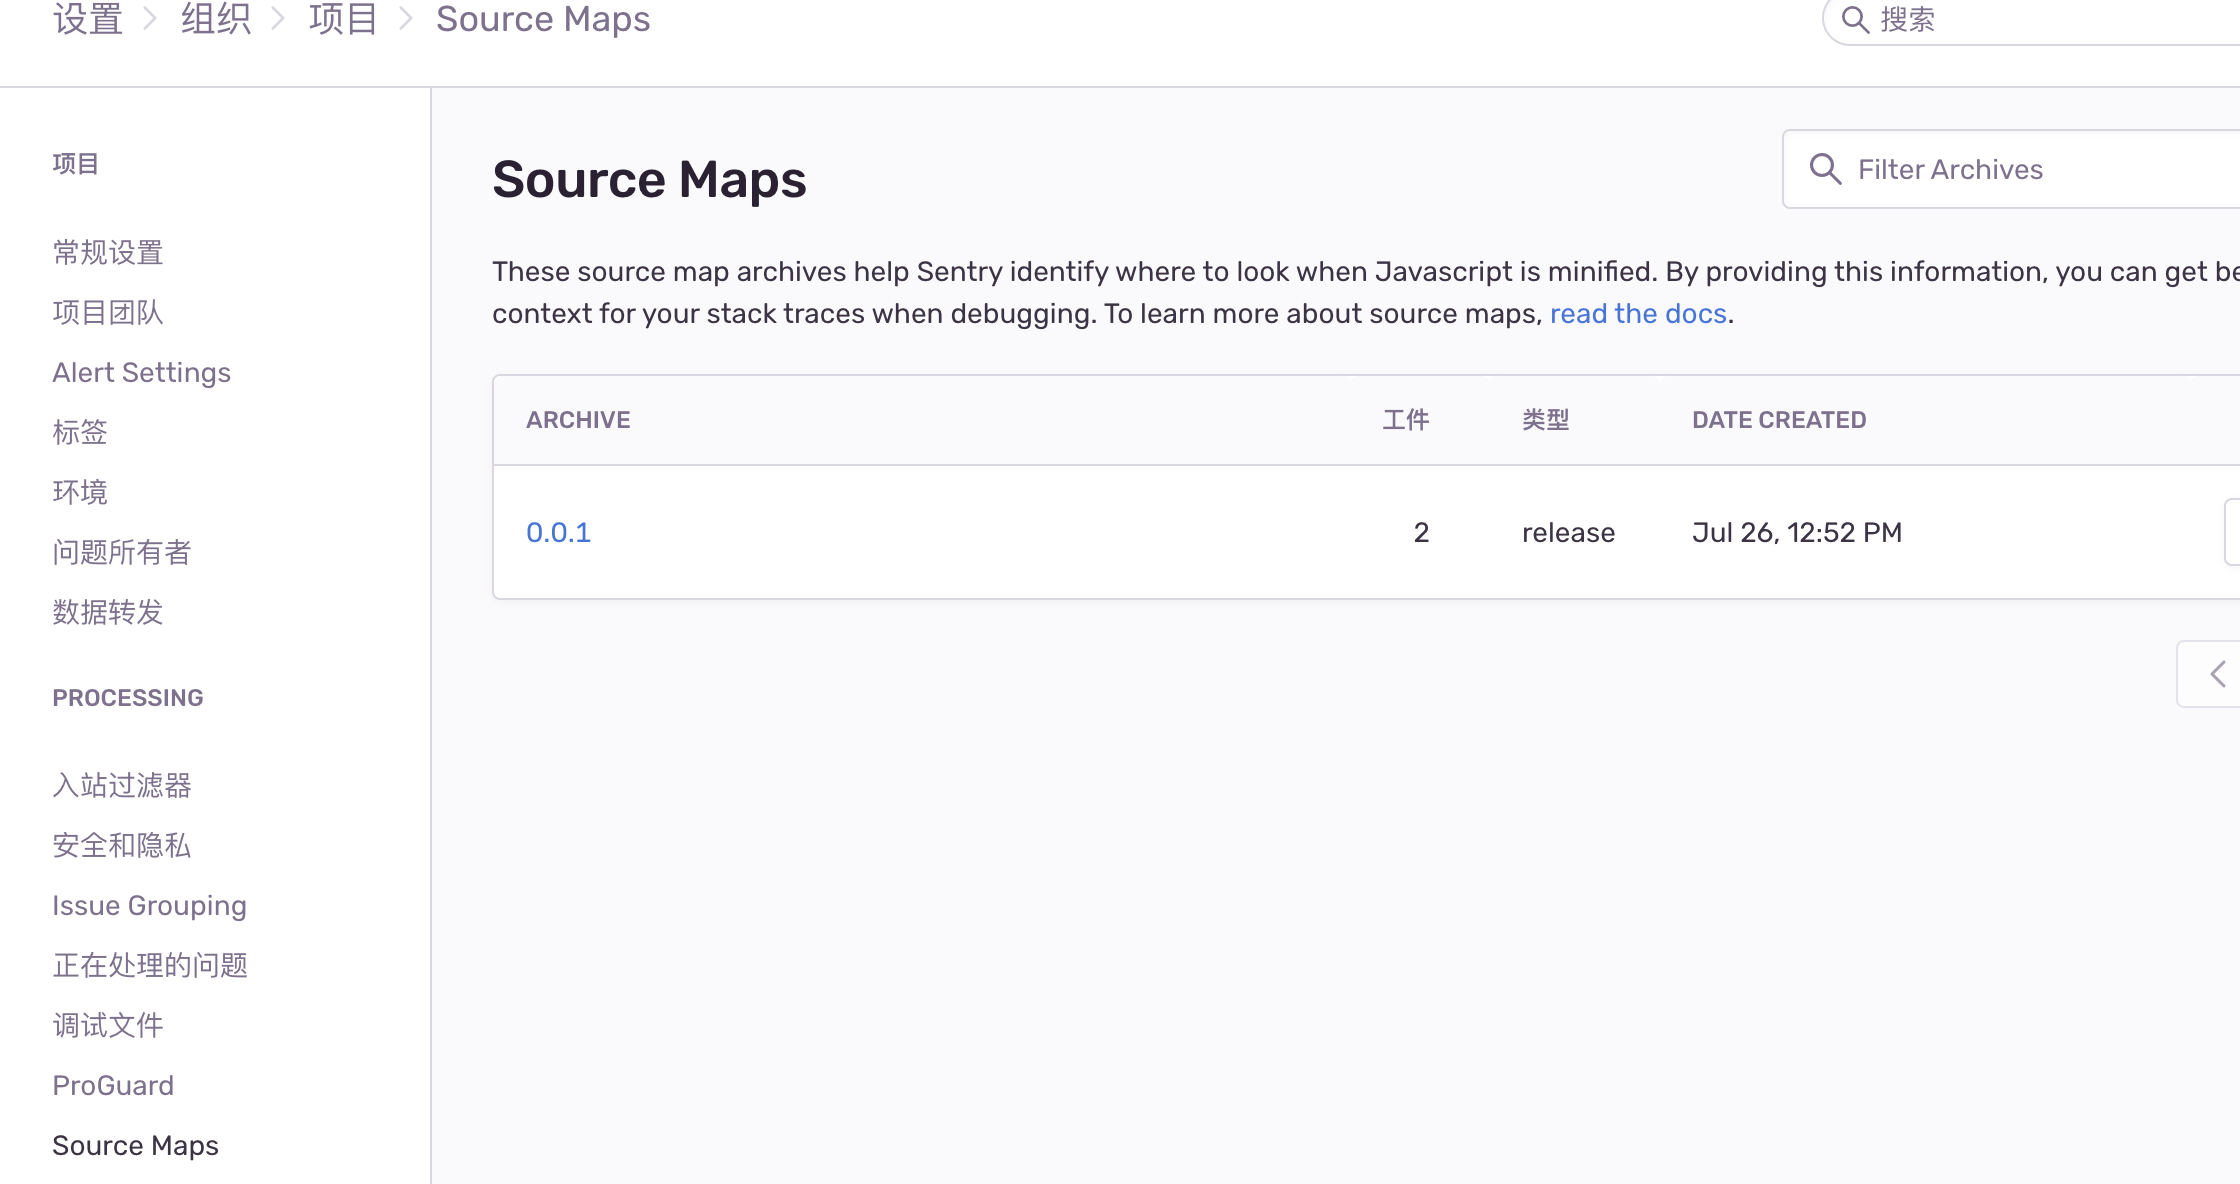
上传后的sourcemap在这里可以看到

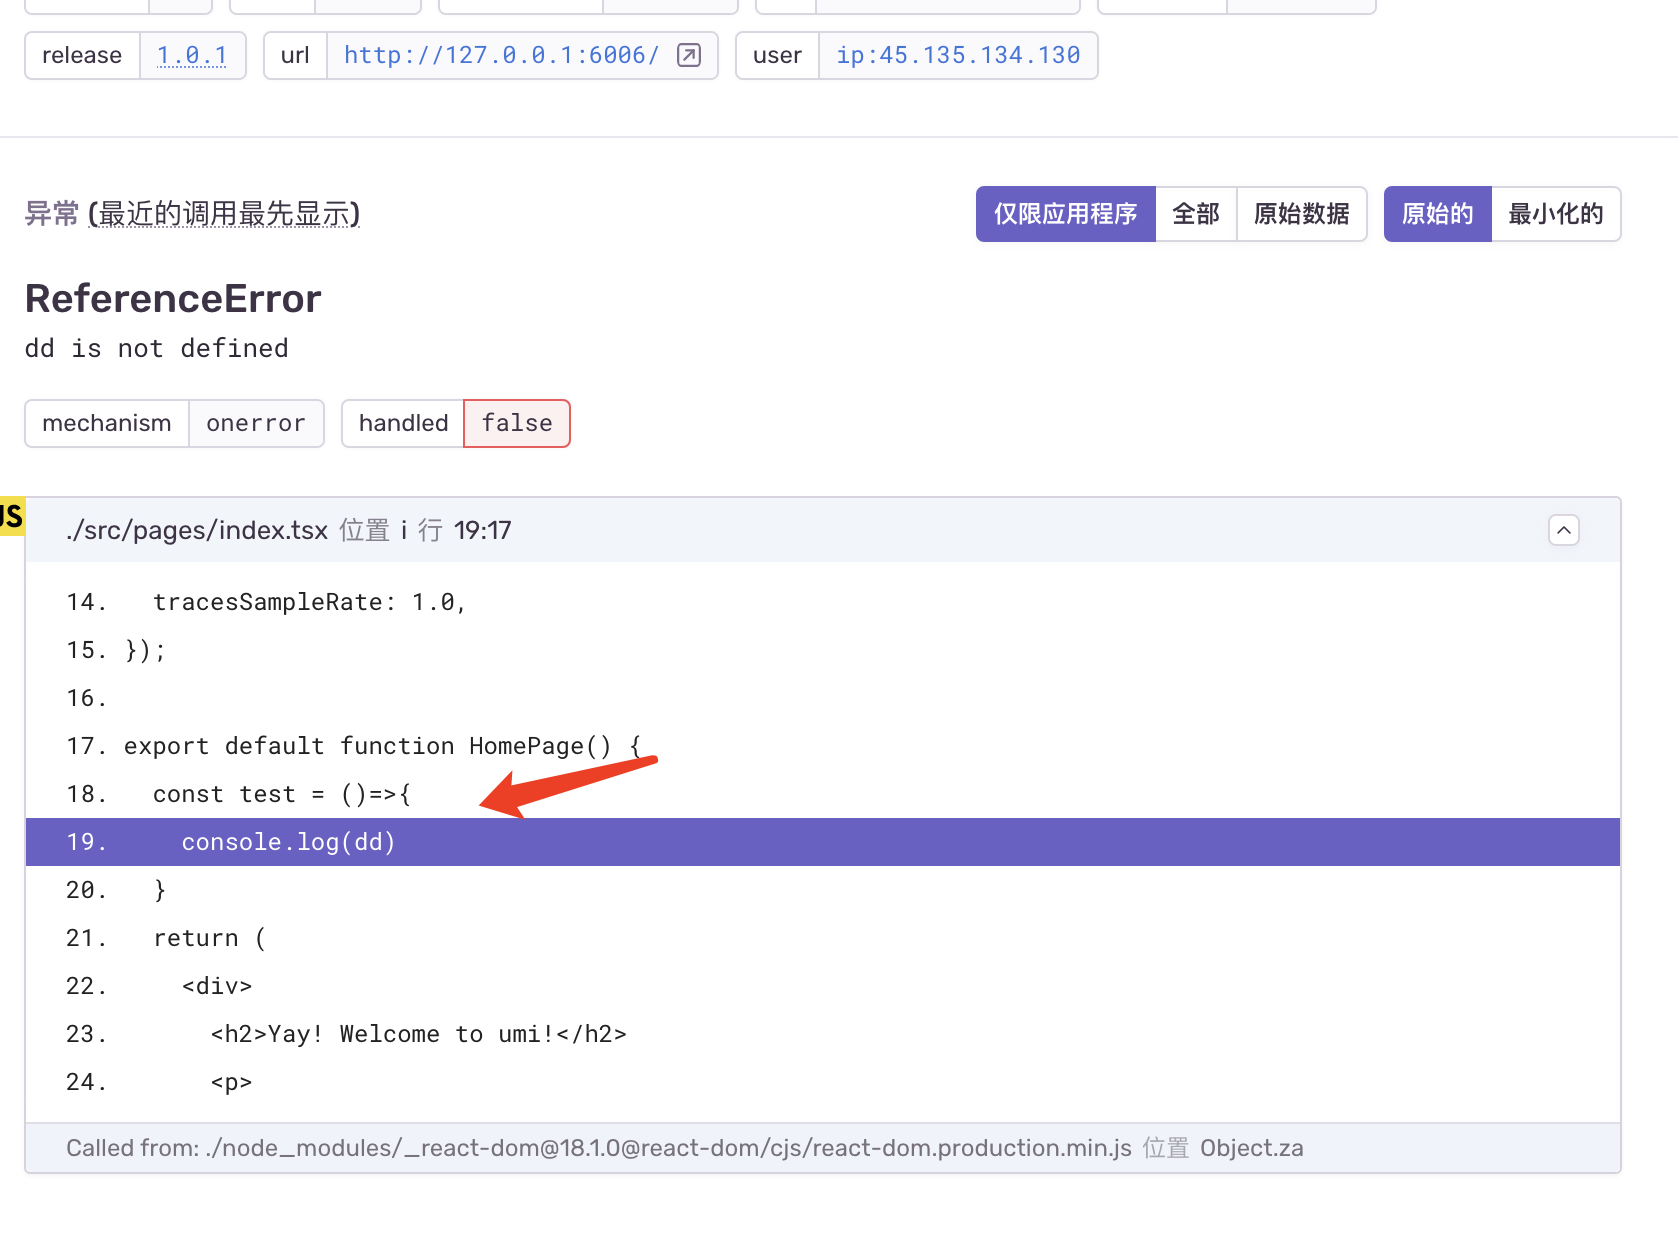
正确上传过 source-map 的项目,可以看到很清晰的报错位置
进入本地打包的dist,
http-server -p 6002启动一个模拟正式环境部署的服务访问看看效果
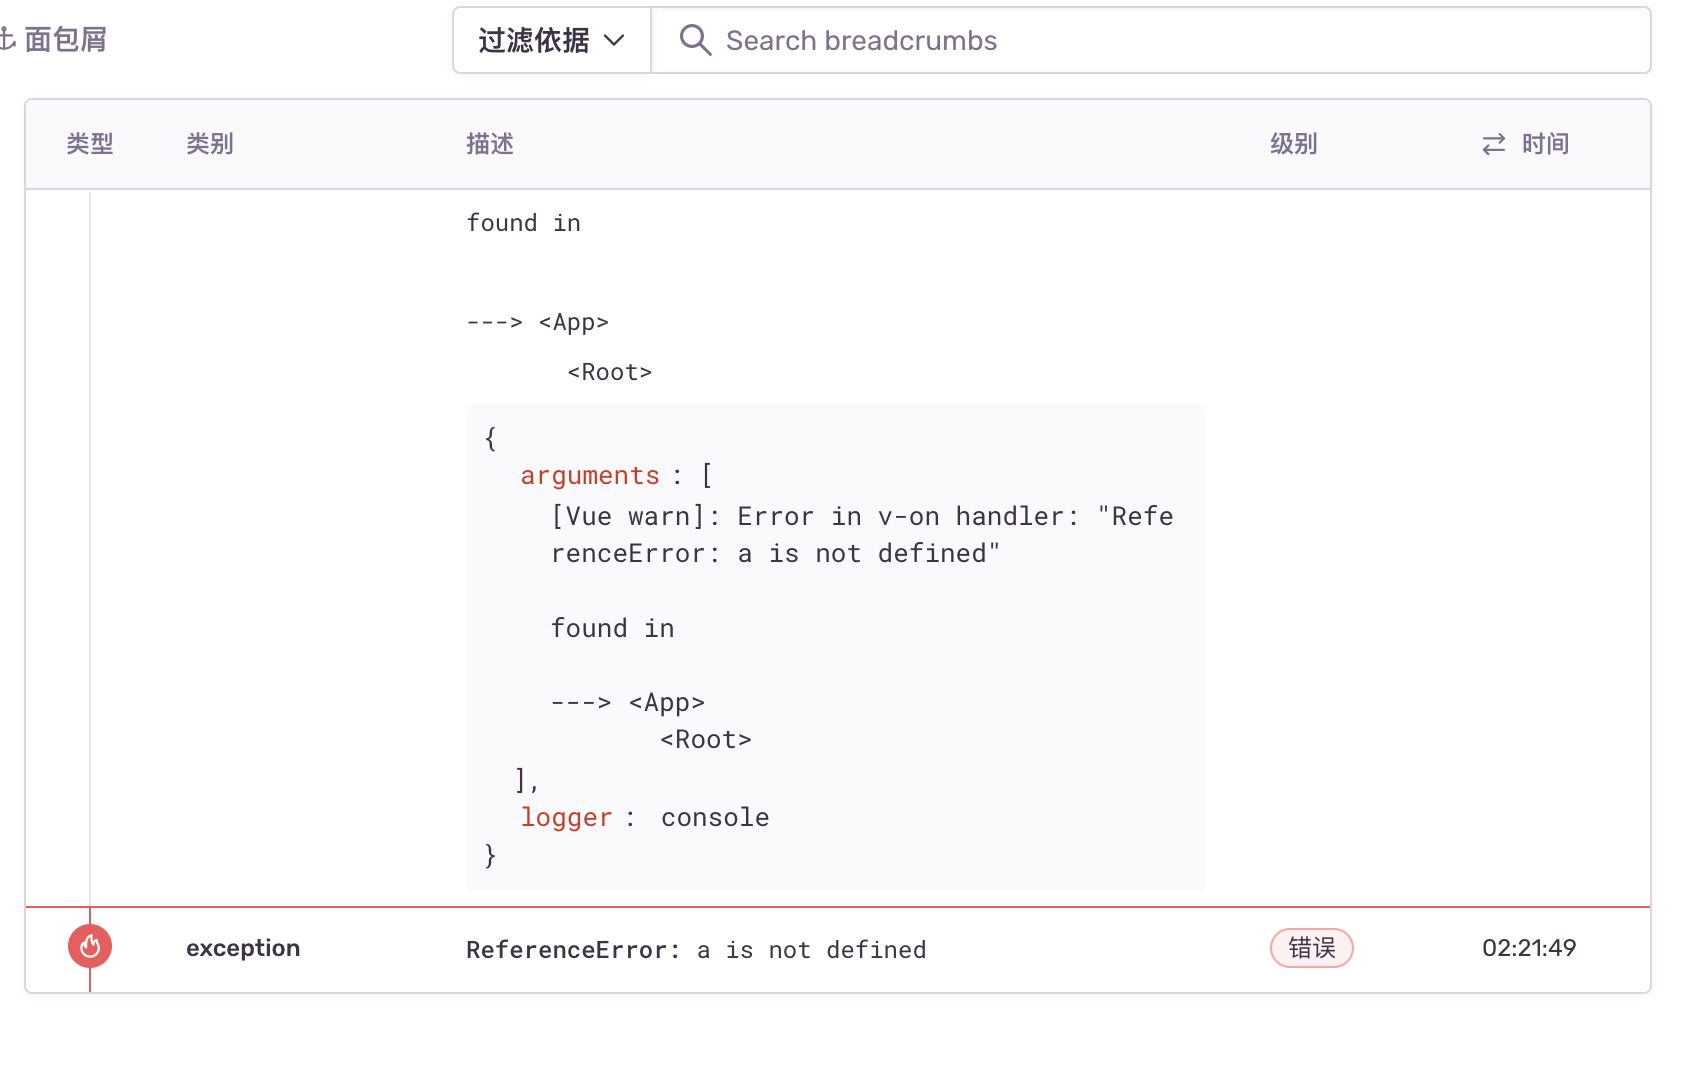
还可以通过 面包屑 功能查看,报错前发生了什么操作
记得别把sourcemap文件传到生产环境,又大又不安全 删除sourcemap, 基于vue2演示的三种方式
// 方式1
"scripts": {
  "build": "vue-cli-service build && rimraf ./dist/js/*.map"
}

// 方式2 单独生成map
// vue.config.js
configureWebpack(config) {
     config.output.sourceMapFilename('sourceMap/[name].[chunkhash].map.js')
     config.plugin('sentry').use(SentryCliPlugin, [{
        include: './dist/sourceMap', // 只上传js
        ignore: ['node_modules'],
        configFile: 'sentry.properties',
        release: process.env.SENTRY_VERSION || '0.0.1', // 版本号,每次都npm run build上传都修改版本号
        cleanArtifacts: true, // 先清理再上传
    }])
}

// 方式3 webpack插件清理
$ npm i webpack-delete-sourcemaps-plugin -D
// vue.config.js
const { DeleteSourceMapsPlugin } = require('webpack-delete-sourcemaps-plugin')

configureWebpack(config) {
    config.plugin.push(
        new DeleteSourceMapsPlugin(), // 清理sourcemap
    )
}
查看 Performance
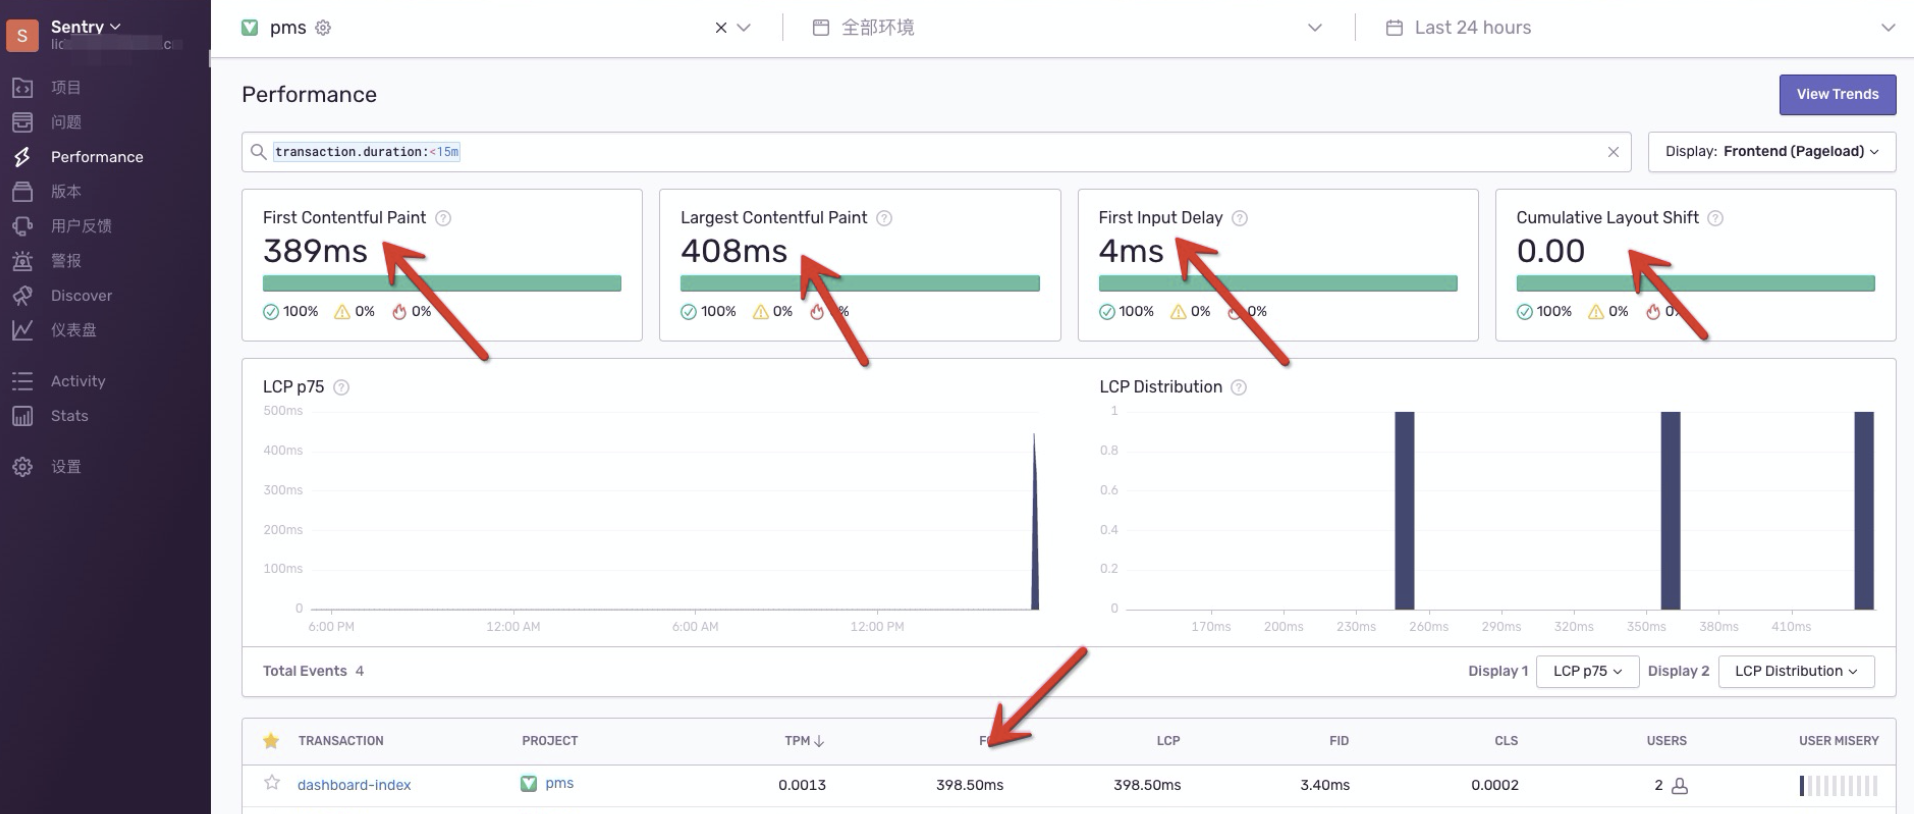
Sentry.init()中,new Integrations.BrowserTracing()的功能是将浏览器页面加载和导航检测作为事物,并捕获请求,指标和错误。
-
TPM: 每分钟事务数 -
FCP:首次内容绘制(浏览器第第一次开始渲染 dom 的时间点) -
LCP:最大内容渲染,代表viewpoint中最大页面元素的加载时间 -
FID:用户首次输入延迟,可以衡量用户首次与网站交互的时间 -
CLS:累计布局偏移,一个元素初始时和消失前的数据 -
TTFB:首字节时间,测量用户浏览器接收页面的第一个字节的时间(可以判断缓慢来自网络请求还是页面加载问题) -
USER:uv数字 -
USER MISERY: 对响应时间难以忍受的用户指标,由sentry计算出来,阈值可以动态修改
Vue3 + Vite + Sentry
创建vue3项目
yarn create vite
安装sentry依赖
npm i @sentry/vue @sentry/tracing
初始化sentry
src/main.js中修改
import { createApp } from "vue";
import { createRouter } from "vue-router";
import * as Sentry from "@sentry/vue";
import { Integrations } from "@sentry/tracing";

const app = createApp({
  // ...
});
const router = createRouter({
  // ...
});

Sentry.init({
  app,
  dsn: "http://xdfada1212@12.715.204.41:9000/2",
  integrations: [
    new Integrations.BrowserTracing({
      routingInstrumentation: Sentry.vueRouterInstrumentation(router),
      tracingOrigins: ["localhost", "my-site-url.com", /^//],
    }),
  ],
  // 不同的环境上报到不同的 environment 分类
//   environment: process.env.ENVIRONMENT,
  // Set tracesSampleRate to 1.0 to capture 100%
  // of transactions for performance monitoring.
  // We recommend adjusting this value in production
    //  高访问量应用可以控制上报百分比
  tracesSampleRate: 1.0,
  release: process.env.SENTRY_VERSION || '0.0.1', // 版本号,每次都npm run build上传都修改版本号
});

app.use(router);
app.mount("#app");
sourcemap上传
修改
vite.config.js配置
安装npm i vite-plugin-sentry -D插件
import { defineConfig } from 'vite'
import vue from '@vitejs/plugin-vue'
import viteSentry from 'vite-plugin-sentry'

const sentryConfig = {
  configFile: './.sentryclirc',
  release: process.env.SENTRY_VERSION || '0.0.1', // 版本号,每次都npm run build上传都修改版本号
  deploy: {
   env: 'production',
  },
  skipEnvironmentCheck: true, // 可以跳过环境检查
  sourceMaps: {
   include: ['./dist/assets'],
   ignore: ['node_modules'],
   urlPrefix: '~/assets', // 注意这里设置正确,否则sourcemap上传不正确
  },
}

// https://vitejs.dev/config/
export default defineConfig({
  plugins: [
    vue(),
    process.env.NODE_ENV === 'production' ? viteSentry(sentryConfig) : null,
  ],
  build: {
    sourcemap: process.env.NODE_ENV === 'production',
  },
})
此时当执行
vite build时,viteSentry这个插件会将构建的sourcemap文件上传到sentry对应的项目release之下。当次版本新捕获到错误时就可以还原出错误行,以及详细的错误信息。
React + Sentry
使用umi项目接入演示
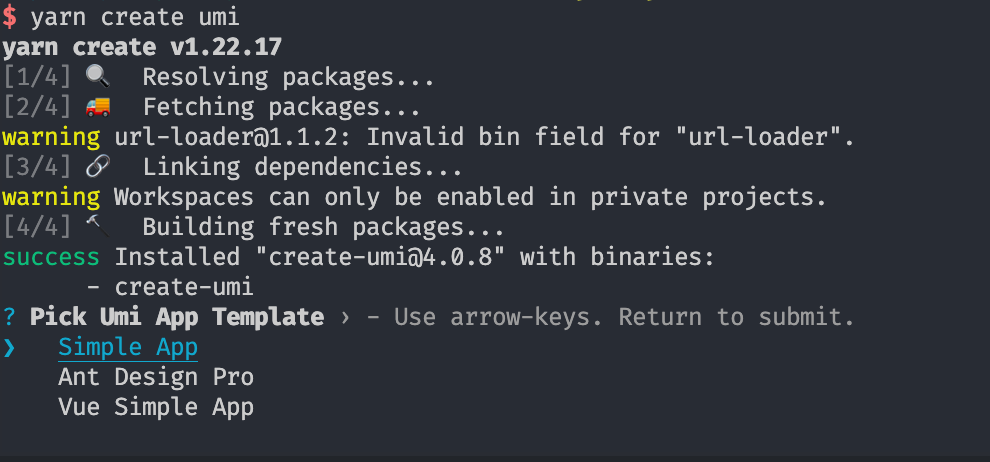
创建一个umi项目
mkdir umi-sentry && cd  umi-sentry

yarn create umi
# Using npm
npm install --save @sentry/react @sentry/tracing
接入sentry
初始化sentry
// pages/index.ts

import * as Sentry from "@sentry/react";
import { BrowserTracing } from "@sentry/tracing";

Sentry.init({
  dsn: "https://xdfa@o1334810.ingest.sentry.io/121",
  integrations: [new BrowserTracing()],

  // Set tracesSampleRate to 1.0 to capture 100%
  // of transactions for performance monitoring.
  // We recommend adjusting this value in production
  release: '0.0.1',
  tracesSampleRate: 1.0,
});
手动抛出异常查看是否能正确上报到sentry
sourcemap上传
根目录创建配置文件 .sentryclirc
[auth]
token=TOKEN控制台获取,TOKEN需要勾选project:write写入权限

[defaults]
url=https://sentry.io/ // 默认地址
org=组织名称,控制台获取
project=react // 项目名称
sourcemap配置上传
npm i @sentry/webpack-plugin -D
// .umirc.ts 修改

const SentryPlugin = require('@sentry/webpack-plugin');

export default {
  devtool: process.env.NODE_ENV === 'production' ? 'source-map' : 'eval', // 开启sourcemao
  chainWebpack(config, { webpack }){
    if (process.env.NODE_ENV === 'production'){//当为prod时候才进行sourcemap的上传,如果不判断,在项目运行的打包也会上传
      config.plugin("sentry").use(SentryPlugin, [{
        ignore: ['node_modules'],
        include: './dist', //上传dist文件的js
        configFile: './sentryclirc', //配置文件地址,这个一定要有,踩坑在这里,忘了写导致一直无法实现上传sourcemap
        release:'1.0.1', //版本号,自己定义的变量,整个版本号在项目里面一定要对应
        deleteAfterCompile: true,
        urlPrefix: '~/' // js的代码路径前缀
       }])
    }
  },
};
# 执行打包上传sourcemap
npm run build

# 进入dist文件,启动http-server 本地服务模拟线上效果
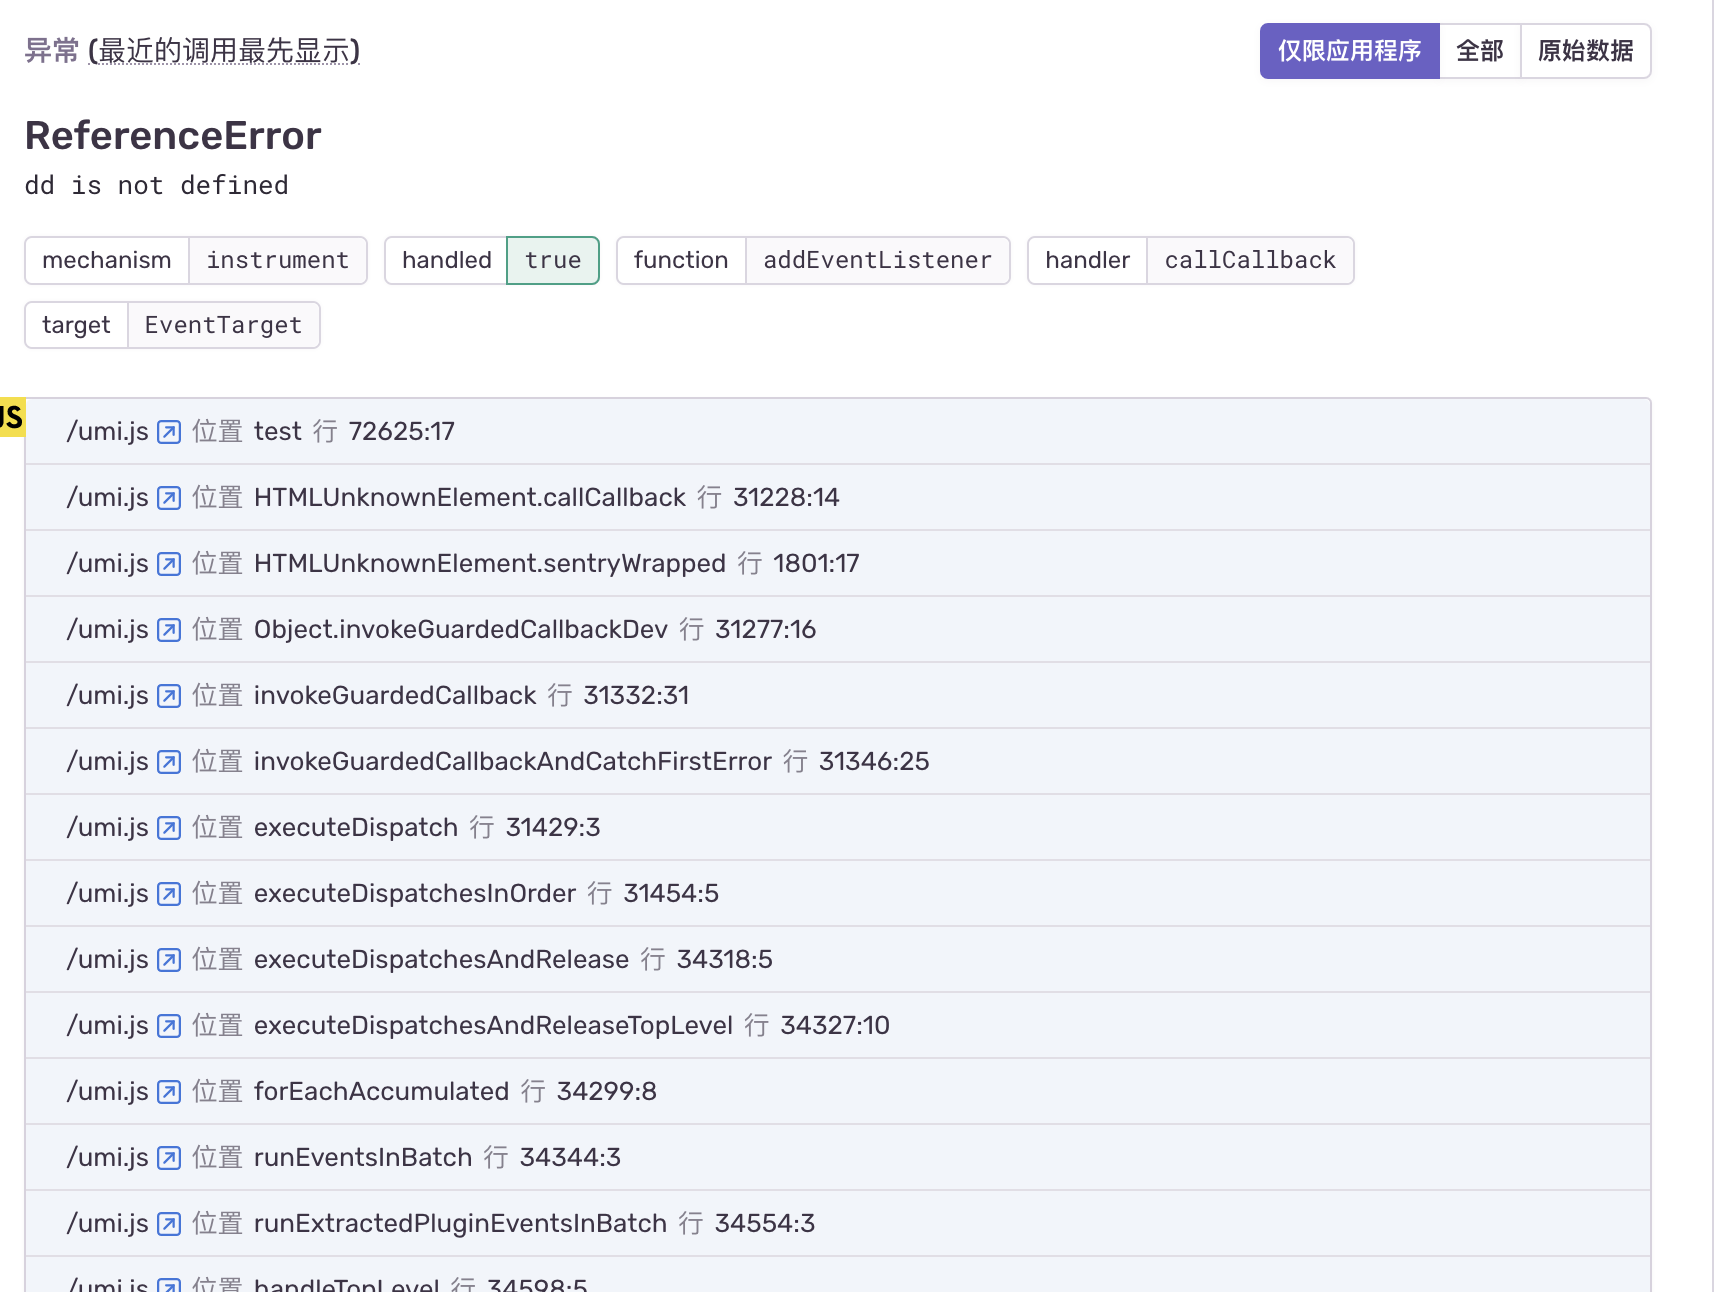
修改代码抛出异常,查看控制台sourcemap解析的效果
注意:npm run build之后,不要把sourcemap上传到生产环境,记得删除
进阶用法
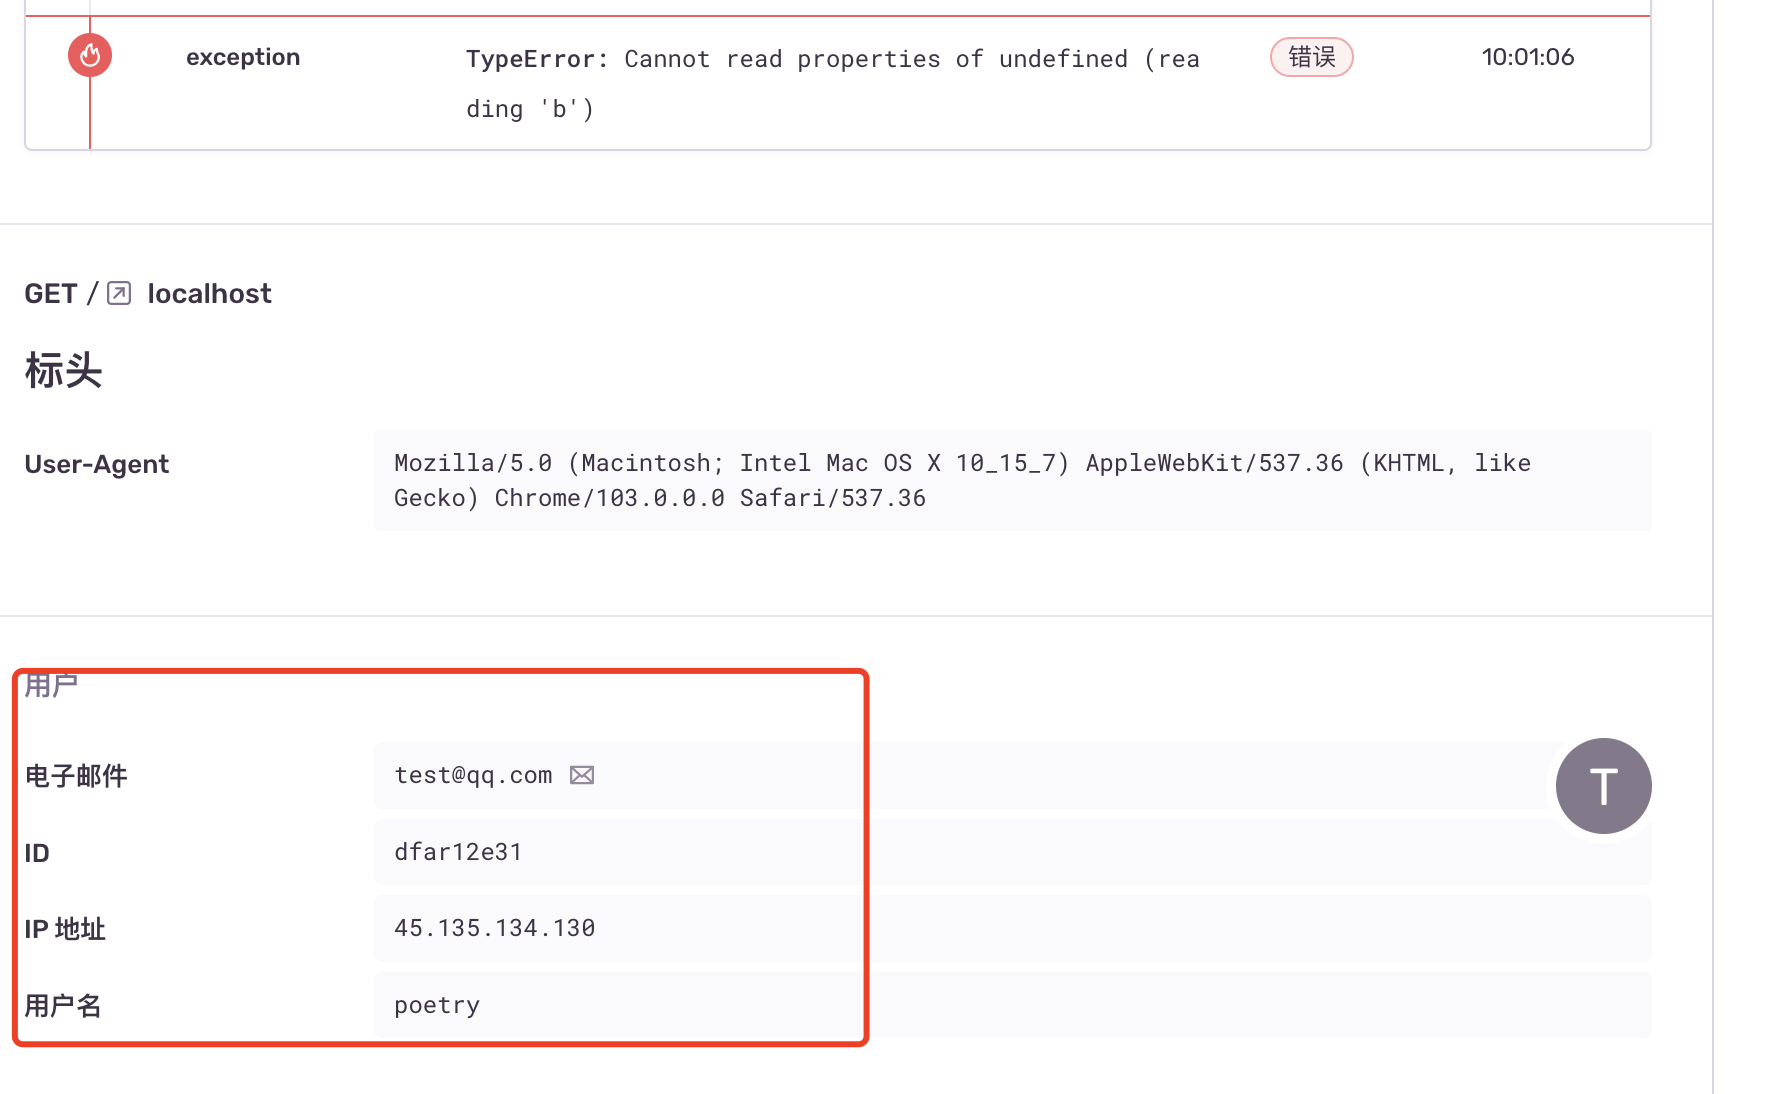
识别用户
在上传的 issues 里面,我们可以借助 setUser 方法,设置读取存在本地的用户信息。(此信息需要持久化存储,否则刷新会消失)
// app/main.js
Sentry.setUser({
  id: 'dfar12e31', // userId cookie.get('userId')
  email: 'test@qq.com', // cookie.get('email')
  username: 'poetry', // cookie.get('username')
})
Vue.prototype.$Sentry = Sentry
错误边界
- 定义错误边界,当组件报错的时候,可以上报相关信息
- 使用
Sentry.ErrorBoundary。加了错误边界,可以把错误定位到组件上面。
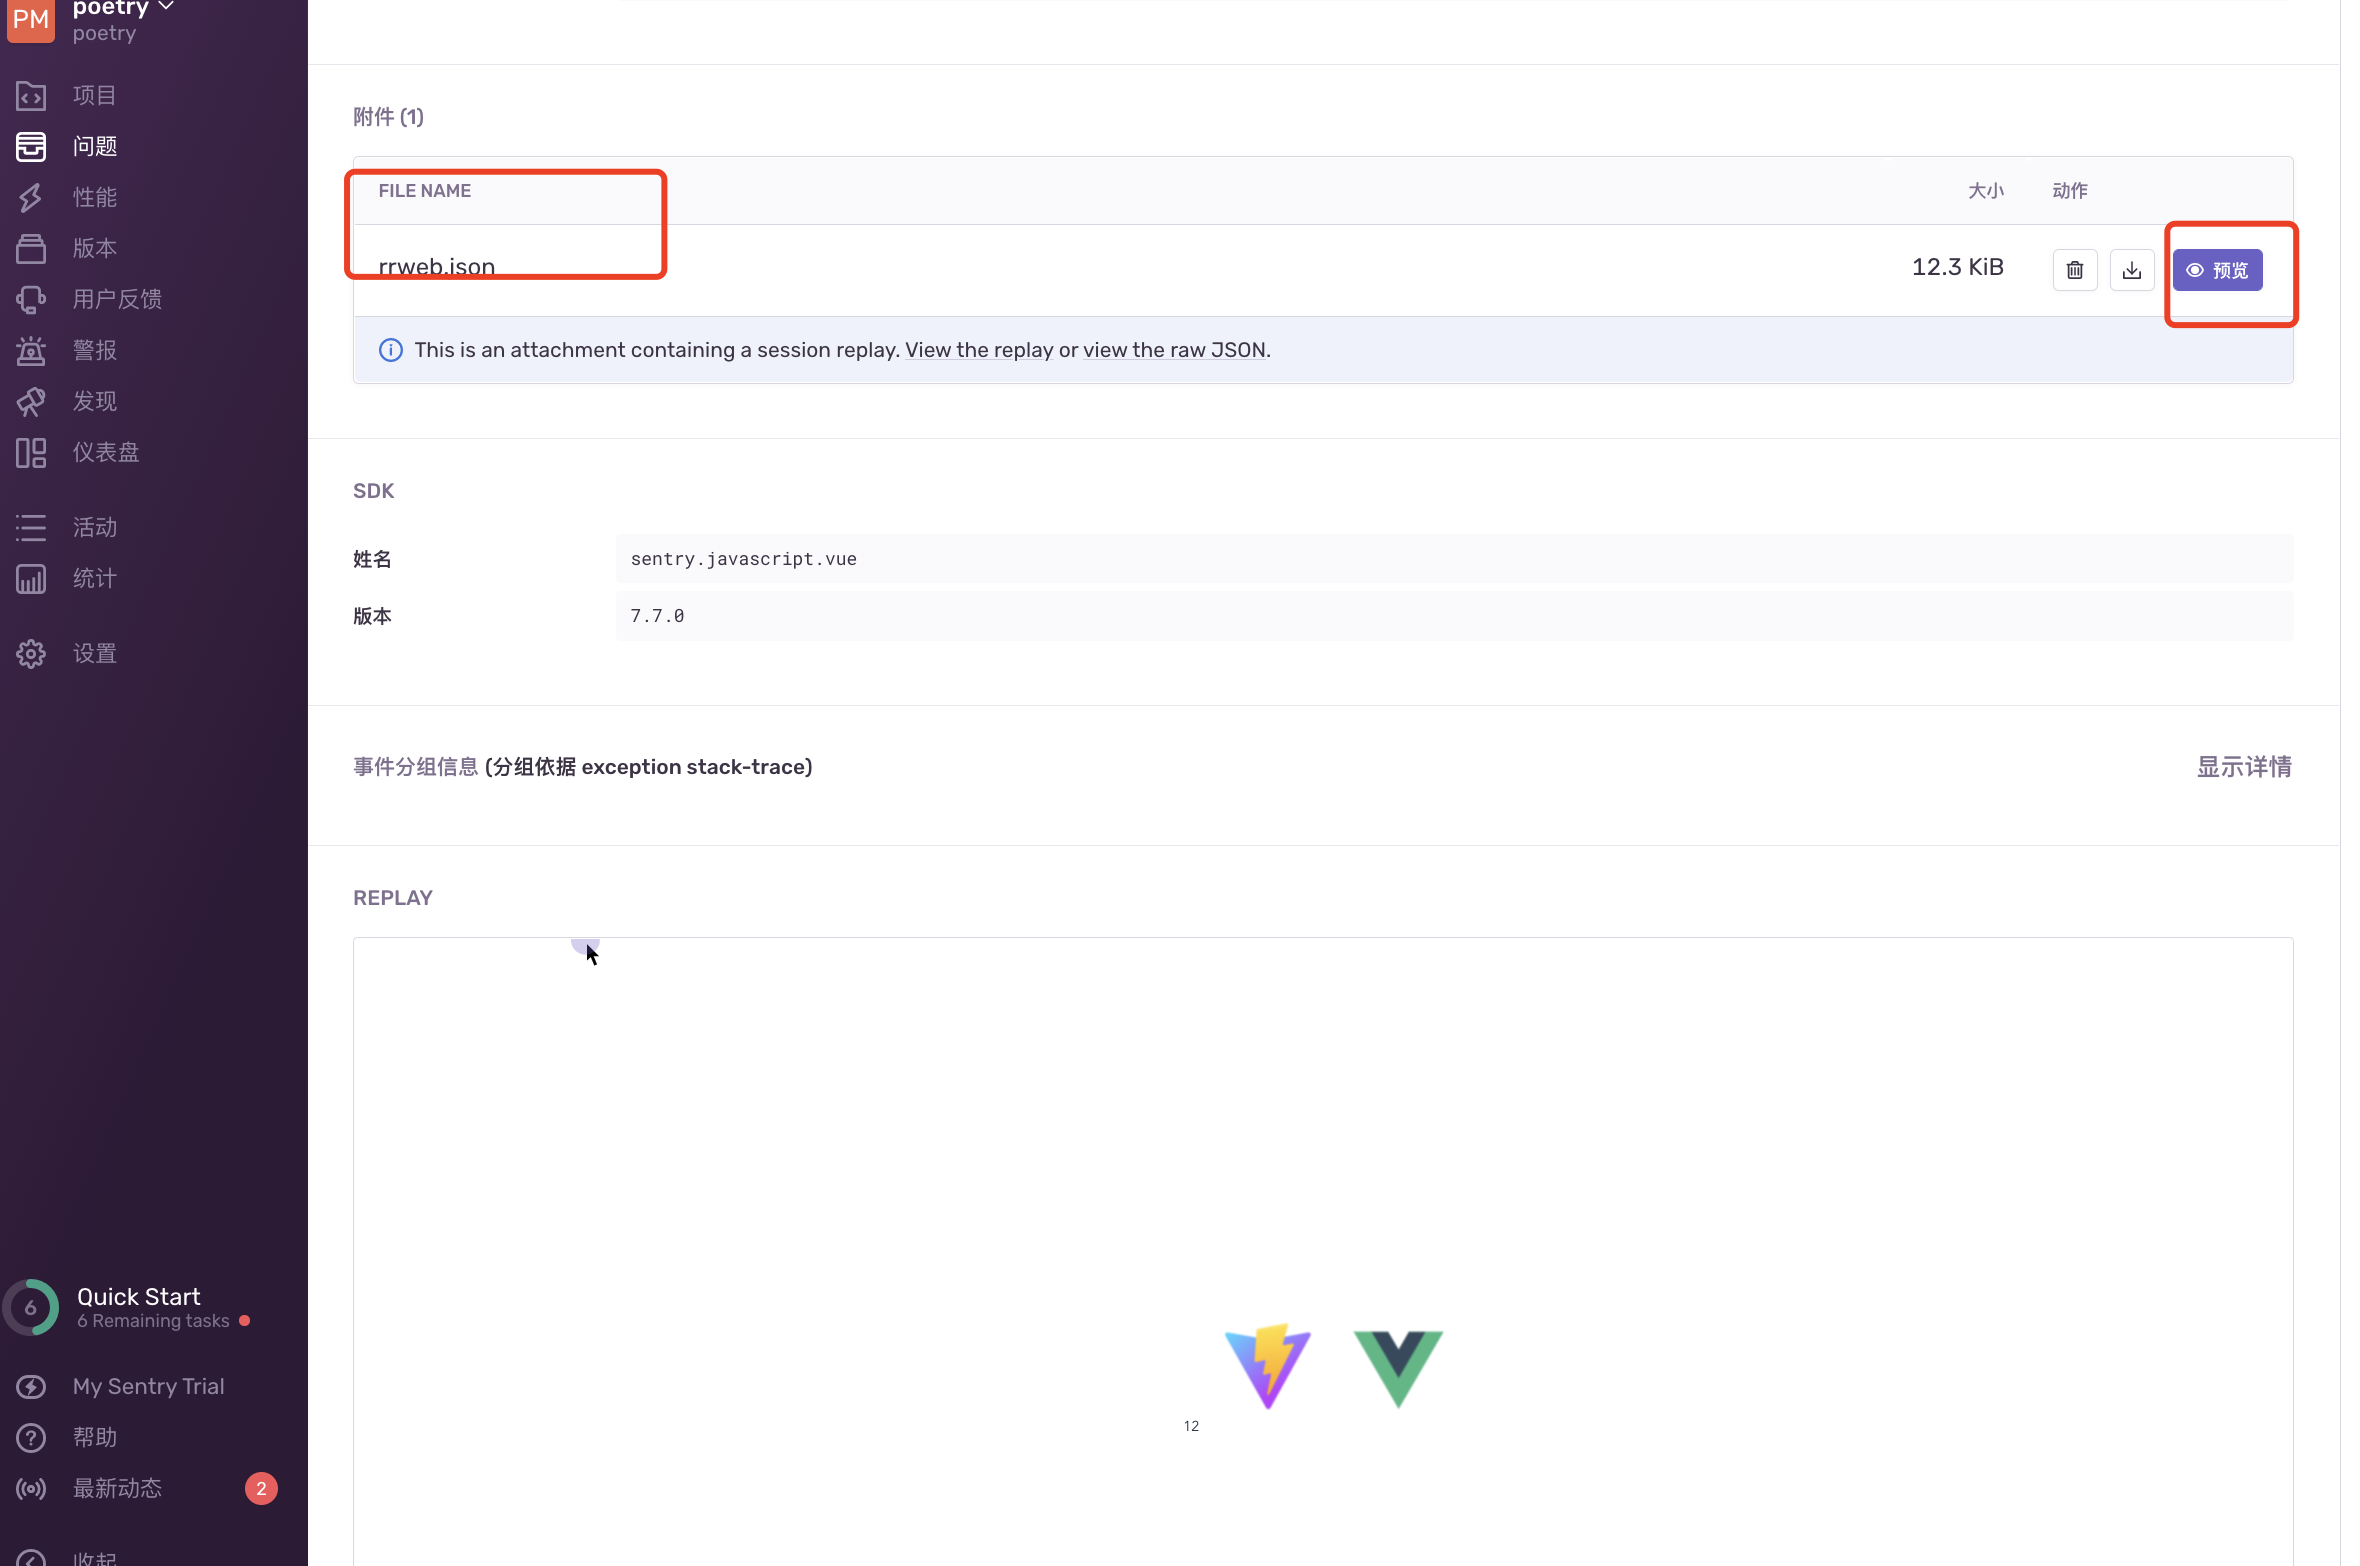
rrweb 重播
npm i @sentry/rrweb rrweb -S
import SentryRRWeb from '@sentry/rrweb';

// app/main.js
Sentry.init({
    Vue,
    dsn: "xxx",
    integrations: [
      new Integrations.BrowserTracing({
        routingInstrumentation: Sentry.vueRouterInstrumentation(router),
        tracingOrigins: ["localhost", "my-site-url.com", /^//],
      }),
      new SentryRRWeb({
        checkoutEveryNms: 10 * 1000, // 每10秒重新制作快照
        checkoutEveryNth: 200, // 每 200 个 event 重新制作快照
        maskAllInputs: false, // 将所有输入内容记录为 *
      }),
    ],
    // 不同的环境上报到不同的 environment 分类
    environment: process.env.ENVIRONMENT,
    //  高访问量应用可以控制上报百分比
    tracesSampleRate: 1.0,
    release: process.env.SENTRY_VERSION || '0.0.1', // 版本号,每次都npm run build上传都修改版本号
    logErrors: true
});
在报错后,可以录屏播放错误发生的情况
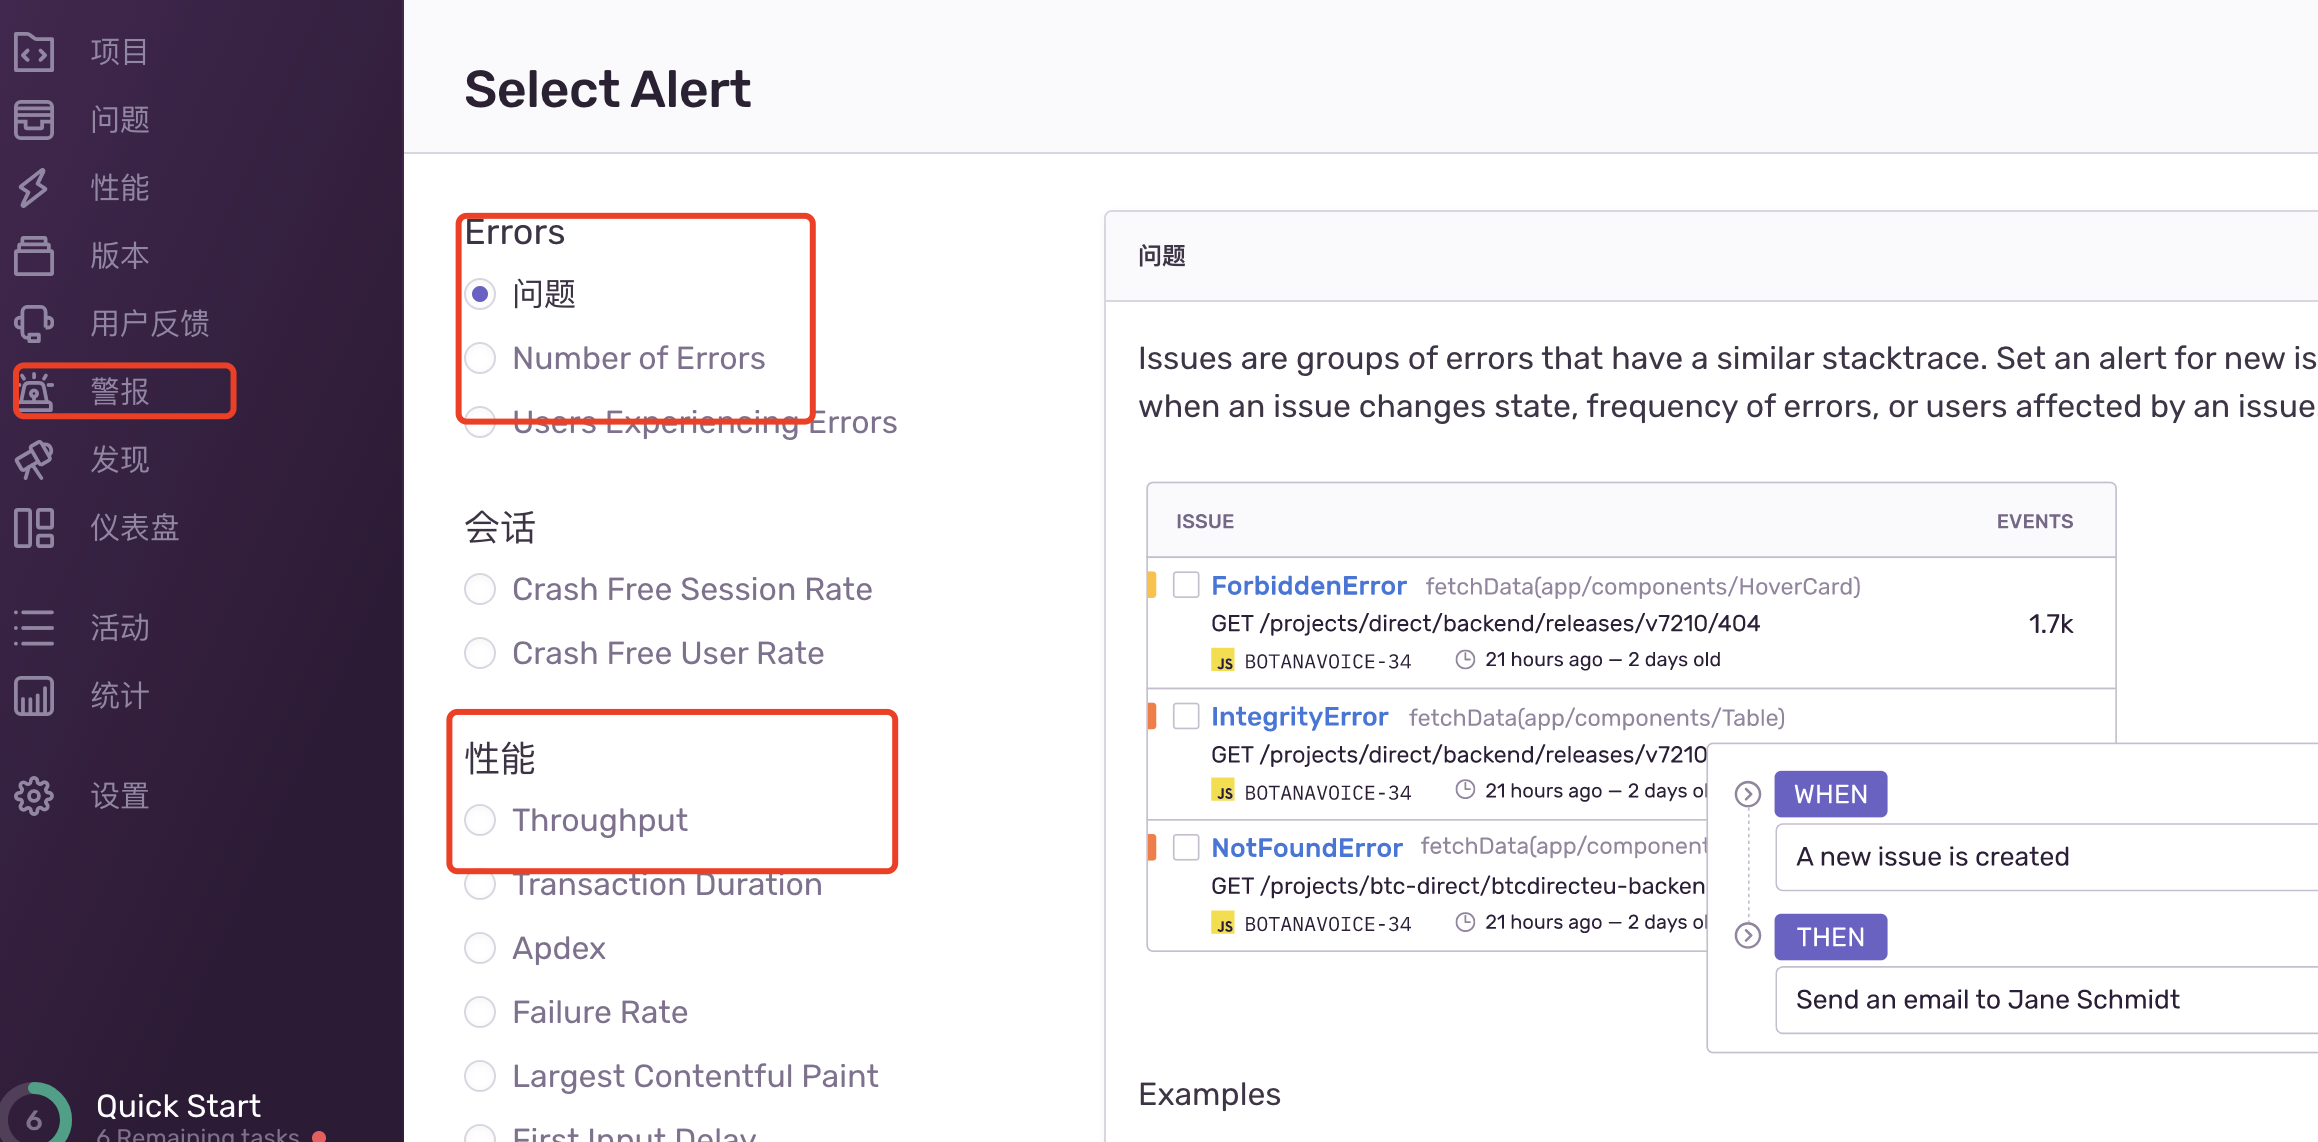
手动设置报警
- 设置报警规则,当我们某些情况,如
issues,performance超过我们设置的阈值,会触发alert。 - 我们可以通过提醒等功能来帮助我们即时发现问题。